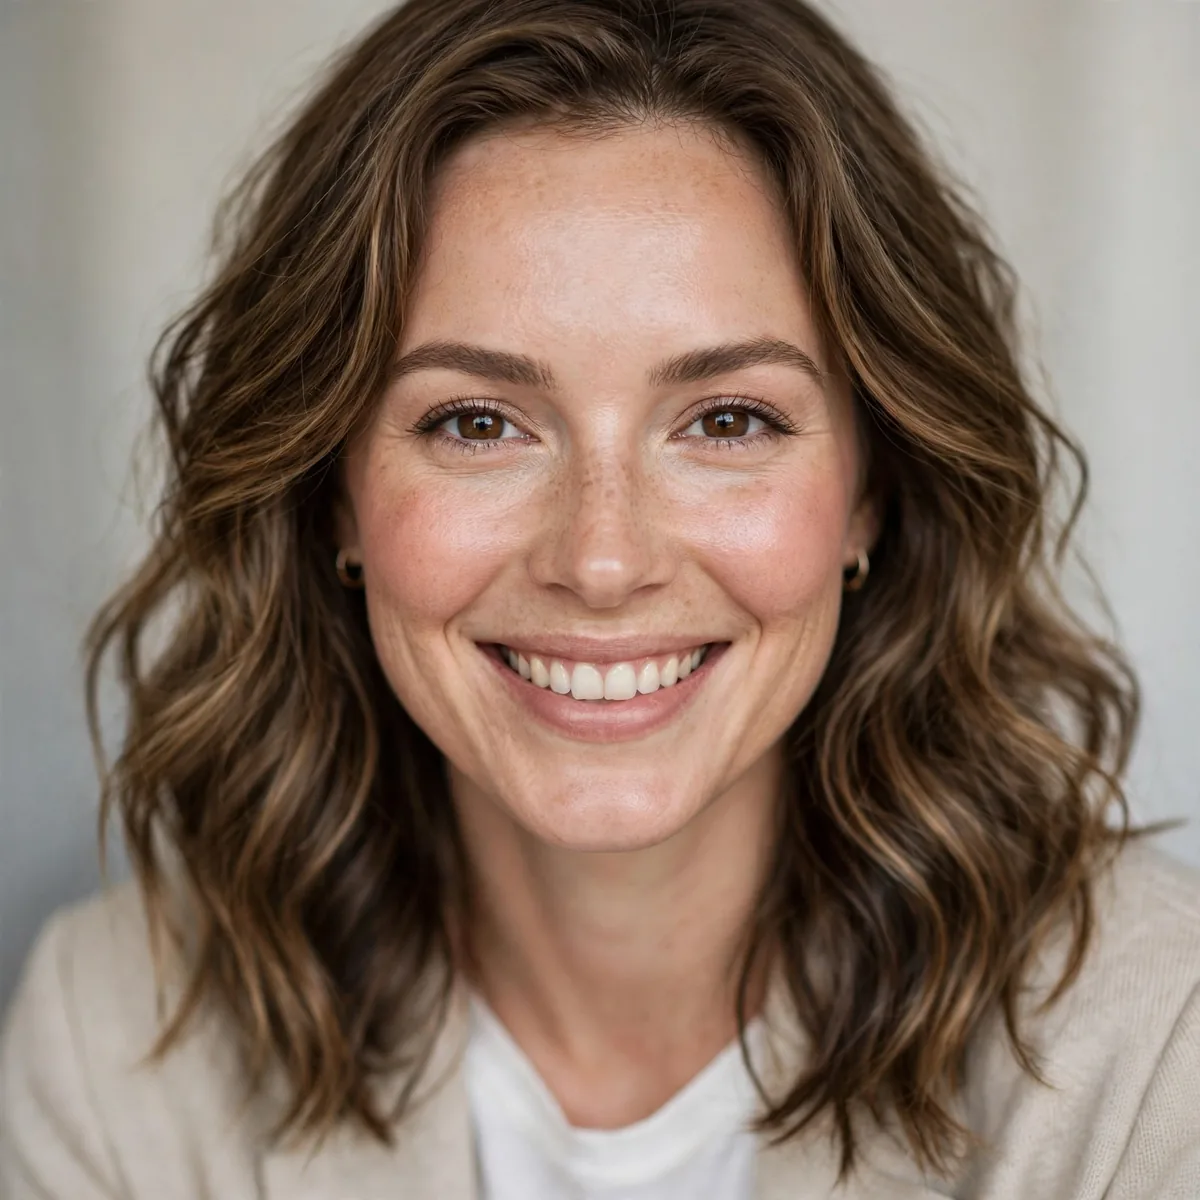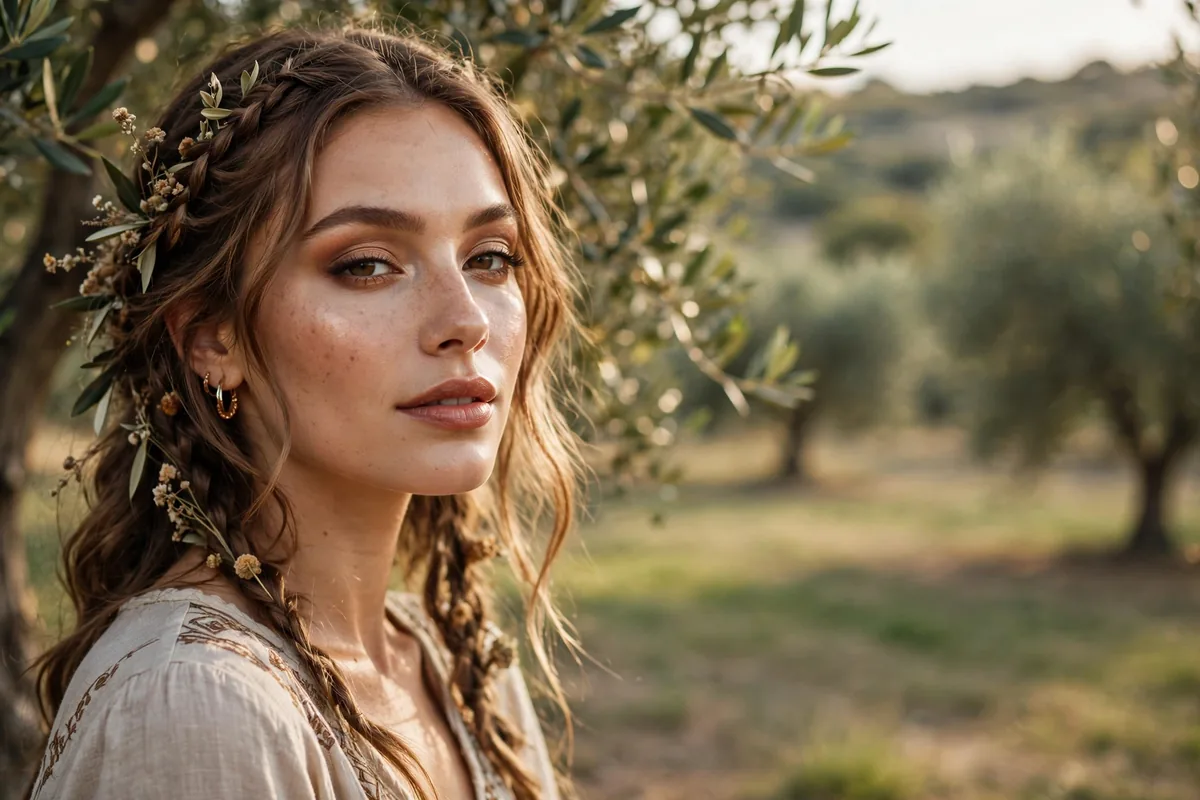
Boho makeup isn't about perfection — it's about looking like the most radiant version of your unfiltered self.
Boho chic makeup draws its magic from the earth: terracotta lids, sun-warmed cheeks, bitten-stain lips, and skin that glows like you've been living outdoors. It's the opposite of the sculpted, filtered aesthetic — here, a little smudge is a feature, not a flaw. The boho girl's face tells a story of festivals and road trips, of golden hours and wildflower fields, and her makeup is the souvenir.
The palette is unmistakable: warm browns, burnt oranges, dusty roses, golden bronzes, and the occasional flash of turquoise or gold. Textures lean dewy and lived-in — cream blushes melted into skin, eyeshadows buffed out with fingers, lips stained rather than lined. This is makeup that moves with you, that looks better at 9pm than it did at noon, that was made for dancing barefoot and laughing too hard.
Below are twenty boho looks ranging from everyday wearable to full festival fantasy. You'll find earthy eye techniques, sun-kissed complexion tricks, and the kind of details — a gold inner-corner, a freckle constellation, a feathered brow — that make boho beauty feel personal rather than costumey. Grab your cream products, warm up your fingers, and let's get a little wild.
Terracotta Sun-Wash Eyes
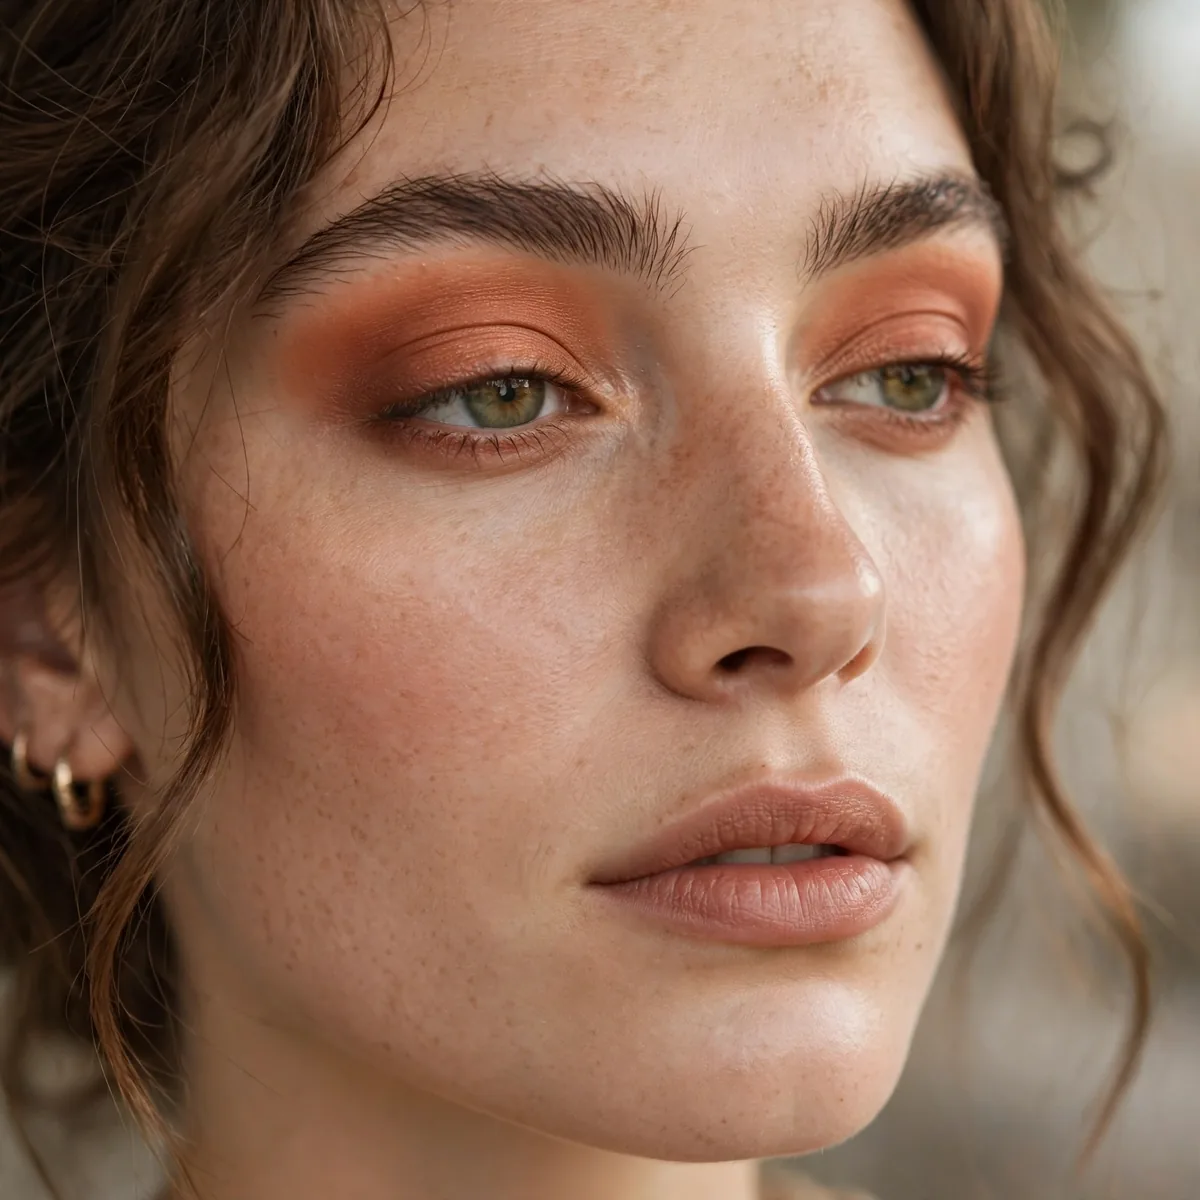
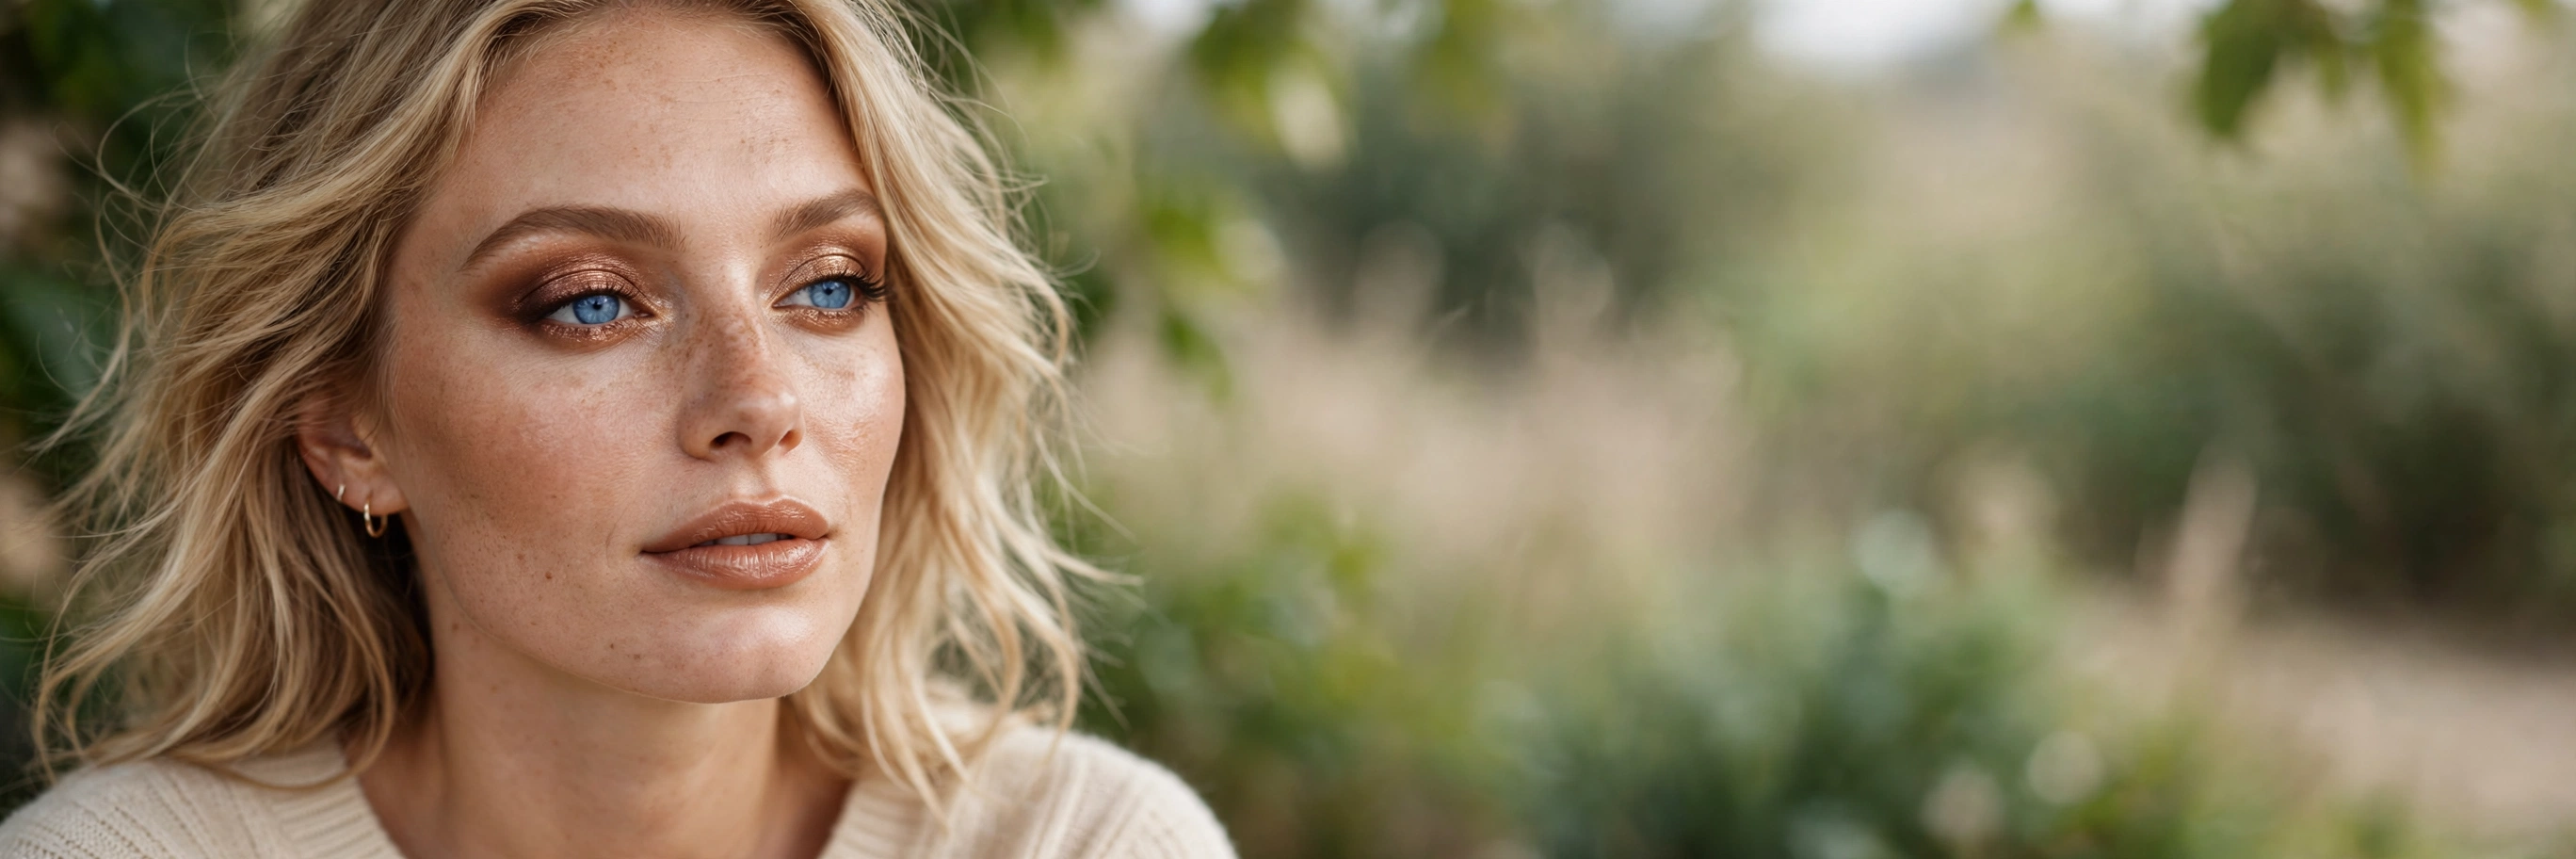
Terracotta is the unofficial color of boho beauty — warm, earthy, and flattering on literally everyone. This look washes a matte terracotta shadow from lash line to brow bone in one sheer, diffused layer, like clay dusted across the lids by a desert wind. The effect is warm and dimensional without any harsh lines, opening up the eyes with color rather than definition. It takes five minutes and looks like you spent an hour.
Application is gloriously low-tech: pat the shadow onto the mobile lid with your ring finger, then use a clean fluffy brush to buff the edges upward and outward until there are no visible lines. The finger-pressing gives you pigment payoff while the buffing creates that airbrushed, sun-warmed gradient. On deeper skin tones, layer a burnt-orange cream underneath to intensify the warmth; on fair skin, one sheer layer is plenty. Finish with two coats of brown-black mascara — black can look too harsh against the softness.
What makes this look so wearable is its forgiveness. Terracotta sits in the sweet spot between brown and orange, so it flatters blue, green, brown, and hazel eyes equally — it makes blue eyes look icier and brown eyes look like honey. Wear it with a bare, glowing complexion and a nude lip for daytime, or deepen the outer corner with a touch of espresso shadow for evening. It also photographs beautifully in natural light, which is why it's a festival favorite.
For longevity, start with an eyeshadow primer — terracotta creams and powders both fade fast on oily lids without one. If you're heading to an outdoor event, set the cream layer with a matching powder shadow to lock it in against heat and humidity. Touch-ups are easy: just press a little more shadow onto the center of the lid with your finger. Boho makeup is supposed to evolve through the day, so let it.
Golden Hour Glow Skin
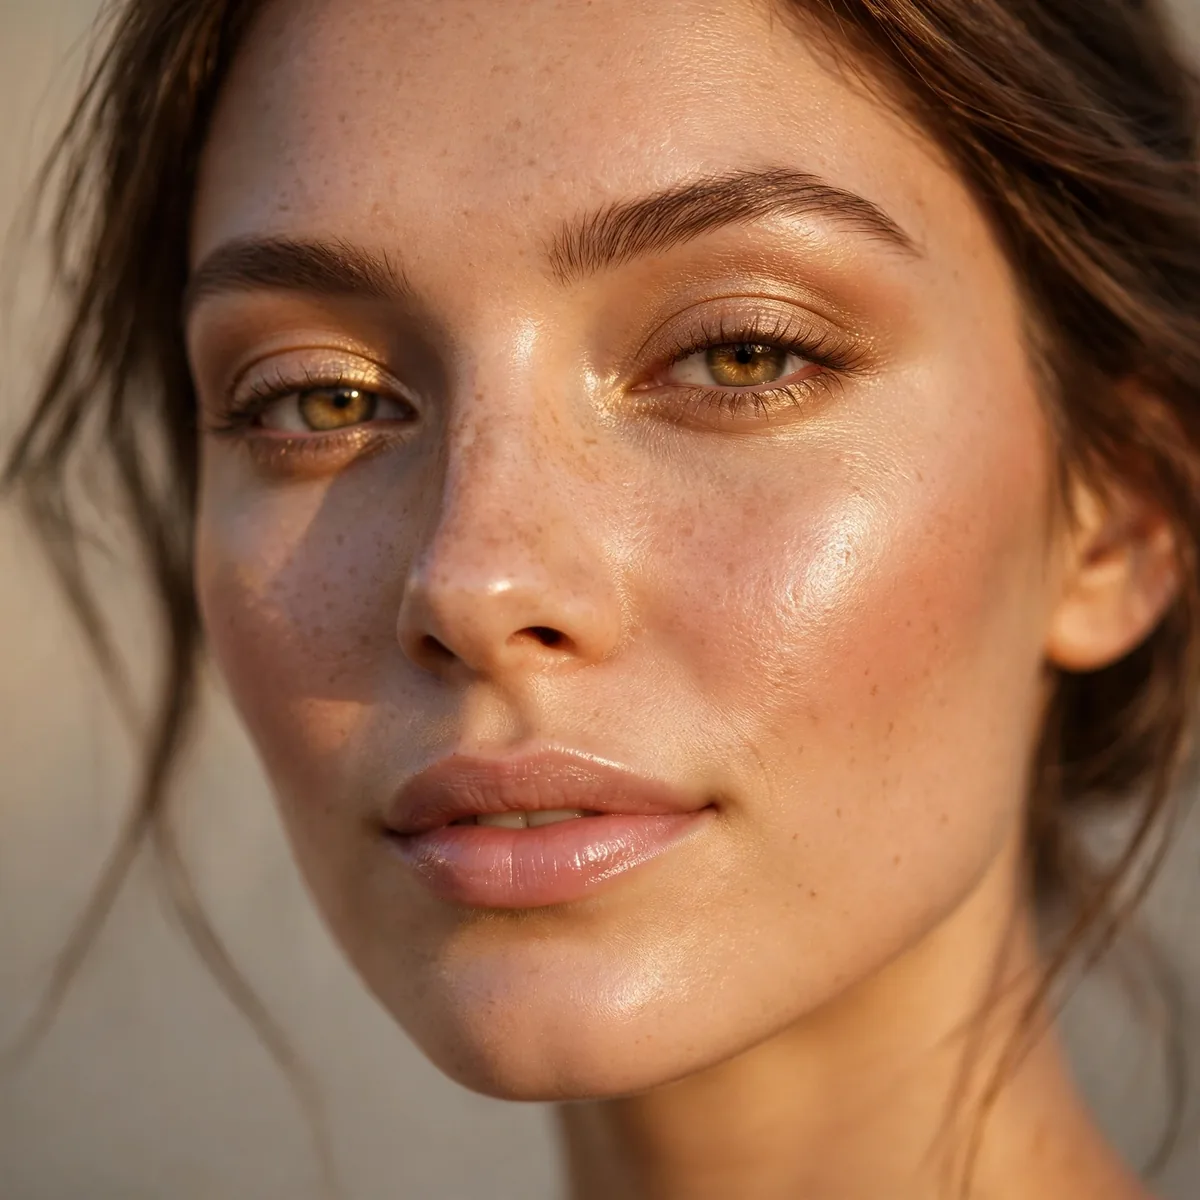
Golden hour glow is a complexion look, not an eye look — the entire face is lit like it's perpetually 6:47pm in late summer. It starts with a dewy, light-coverage base: a tinted moisturizer or skin tint with hyaluronic acid, applied thin and sheered out with a damp sponge. Then liquid highlighter goes on every high plane — cheekbones, brow bones, cupid's bow, the bridge of the nose — in a warm champagne or golden tone. The finish is wet-looking in the most expensive way.
The secret is layering liquid over liquid before any powder touches the face. Dot cream bronzer along the temples, the hollows of the cheeks, and the jawline, blending with the same damp sponge in bouncing motions. Then press cream blush — a warm peach or coral — into the apples of the cheeks and blend upward toward the temples. The creams melt together into a seamless, sun-touched flush that powder alone can never replicate. Set only the T-zone with the sheerest veil of translucent powder.
This look is the foundation of nearly every boho makeup style, so mastering it pays dividends. On oily skin, swap the tinted moisturizer for a mattifying primer on the T-zone only, keeping the cheeks and temples dewy — strategic glow reads as intentional, not shiny. On dry or mature skin, mix a drop of facial oil into your base for extra luminosity. The golden hour glow works for every age because it's about radiance, not coverage.
For all-day wear, mist with a hydrating setting spray after application and again at midday — it reactivates the dewy finish without adding product. Carry blotting papers, not powder, for touch-ups; pressing powder over dewy makeup kills the glow you're working so hard to maintain. In photos, this skin looks three-dimensional and alive — no filter required, though it certainly doesn't hurt.
Smudged Kohl Festival Eyes
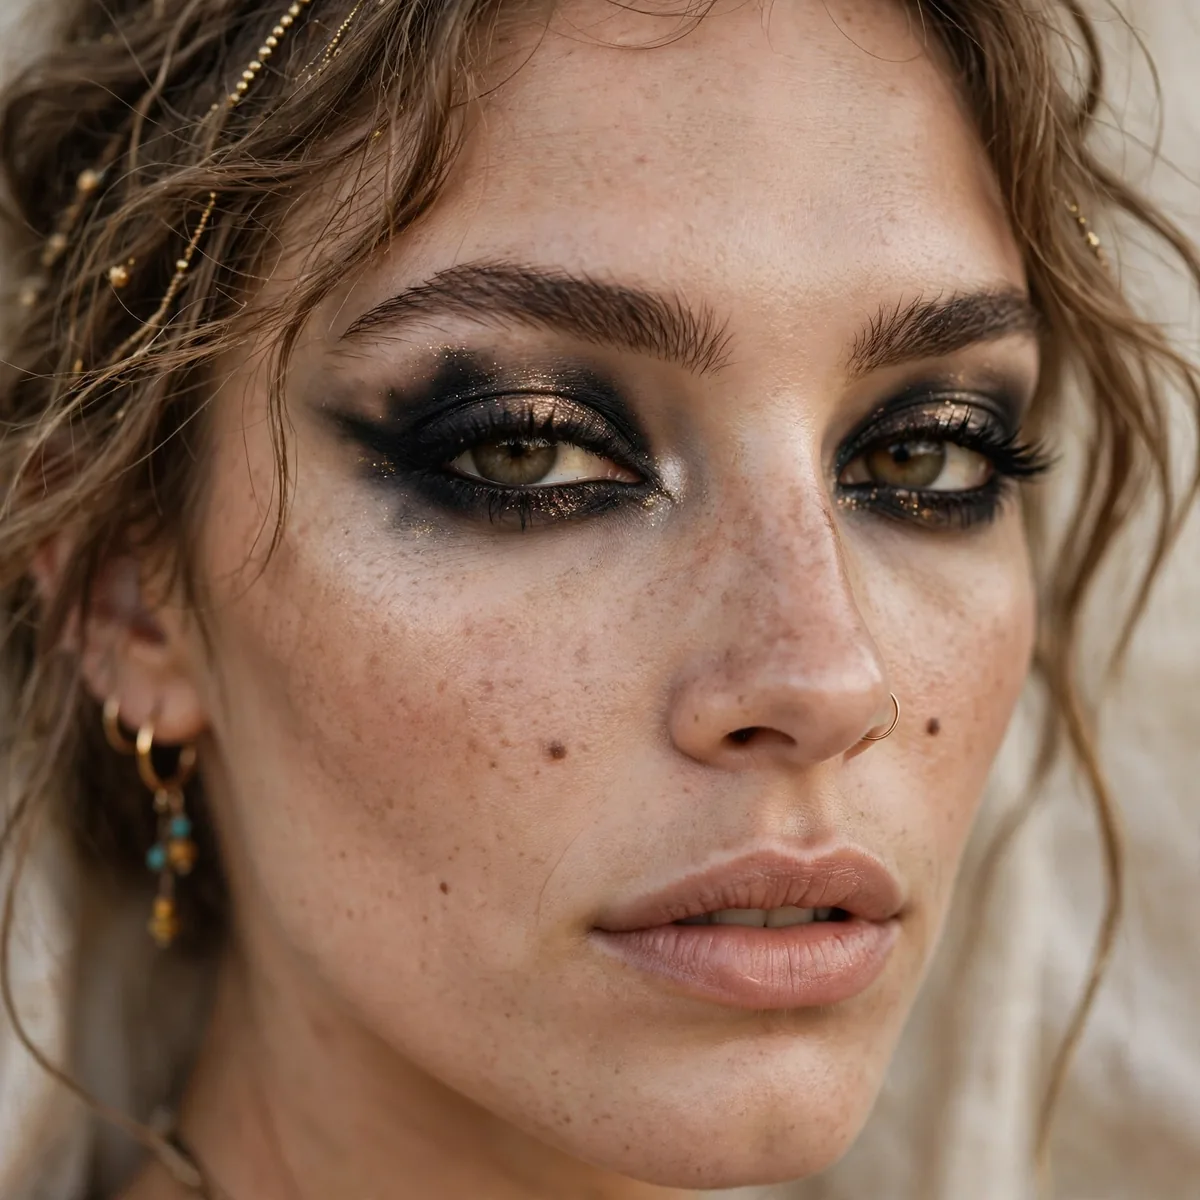
Smudged kohl is boho's answer to the precise cat eye — all the drama, none of the ruler-straight pressure. This look rims the entire eye in a soft black or deep brown kohl pencil, then smokes it out with a small brush or even a cotton swab until the line dissolves into a hazy, lived-in halo. The result is eyes that look mysterious and a little wild, like you've been dancing until dawn — in the best possible way.
Technique matters more than product here. Line the upper lash line, the lower lash line, and the waterline with the kohl, then immediately — before it sets — smudge the upper and lower lines outward with a short, dense brush. The key is keeping the smudging tight to the lash line on top and slightly more diffused below; this gives you the smoky intensity without raccoon territory. A brown kohl is more forgiving than black for daytime, while black after dark is pure festival magic.
What elevates this from messy to intentional is the rest of the face. Keep the complexion fresh and glowing, add a warm flush of bronzer, and finish with a nude or bitten-berry lip — the contrast between the undone eyes and the polished skin is the whole point. This look is also incredibly eye-shape friendly: on hooded eyes, the smudging creates depth where a crisp line would disappear; on deep-set eyes, the halo effect brings them forward.
For staying power, choose a waterproof kohl and set the smudged edges with a matching powder shadow — this locks the haze in place without sharpening it. Tightline the upper waterline as well; it makes lashes look thicker and prevents the dreaded gap between liner and lashes. At the end of the night, remove with a proper oil-based cleanser — kohl that's slept in is not the boho look, it's just tired.
Freckle Constellation Cheeks
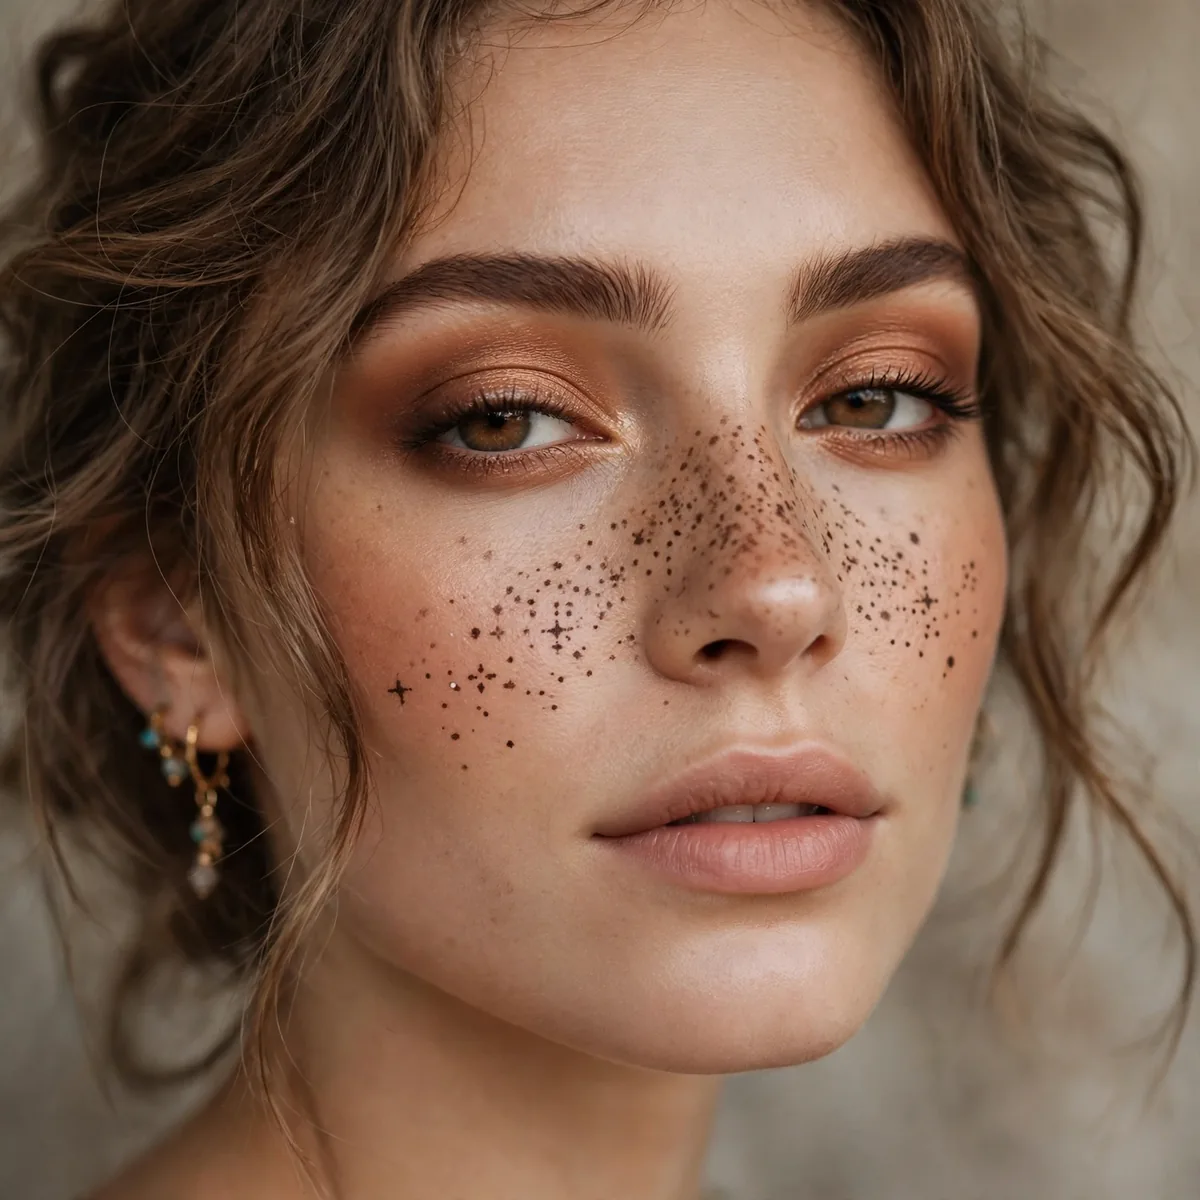
Faux freckles are boho beauty's most charming trick — a scatter of tiny brown dots across the nose and cheeks that suggests summers spent outdoors and a life unbothered by sunscreen lectures. The constellation part is key: rather than random dots, place them in a deliberate-but-natural pattern, denser across the bridge of the nose and fading out toward the cheeks, varying the sizes from pinprick to slightly larger. It should look like the sun did it, not a stencil.
The best tool is a freckle pen or a fine-tipped brown liquid liner in a shade that matches your natural undertones — ash brown for cool skin, warm brown for warm skin. Dot, then immediately tap each dot with your fingertip to soften the edges; fresh dots look drawn-on, but softened dots look real. Vary your pressure for size variation, and add a few across the forehead and chin for believability.
This look pairs beautifully with minimal everything else: brushed-up brows, a wash of bronzer, clear or tinted lip balm. The freckles become the focal point, and the overall effect is youthful and free-spirited. It works on every skin tone — on deeper skin, use a rich chocolate brown pen and place the freckles where light naturally hits. For a festival twist, dot a few metallic gold freckles among the brown ones; they catch the light when you move.
Longevity tip: freckle pens vary wildly in staying power, so set your dots with a tiny dusting of translucent powder applied with a small brush. Avoid heavy setting sprays directly on the freckles, which can make them bleed. If a dot looks too dark, don't remove it — just tap more foundation over it. Imperfection is the entire aesthetic here, so relax and let the sun-kissed illusion do its work.
Bronzed Goddess Cheeks
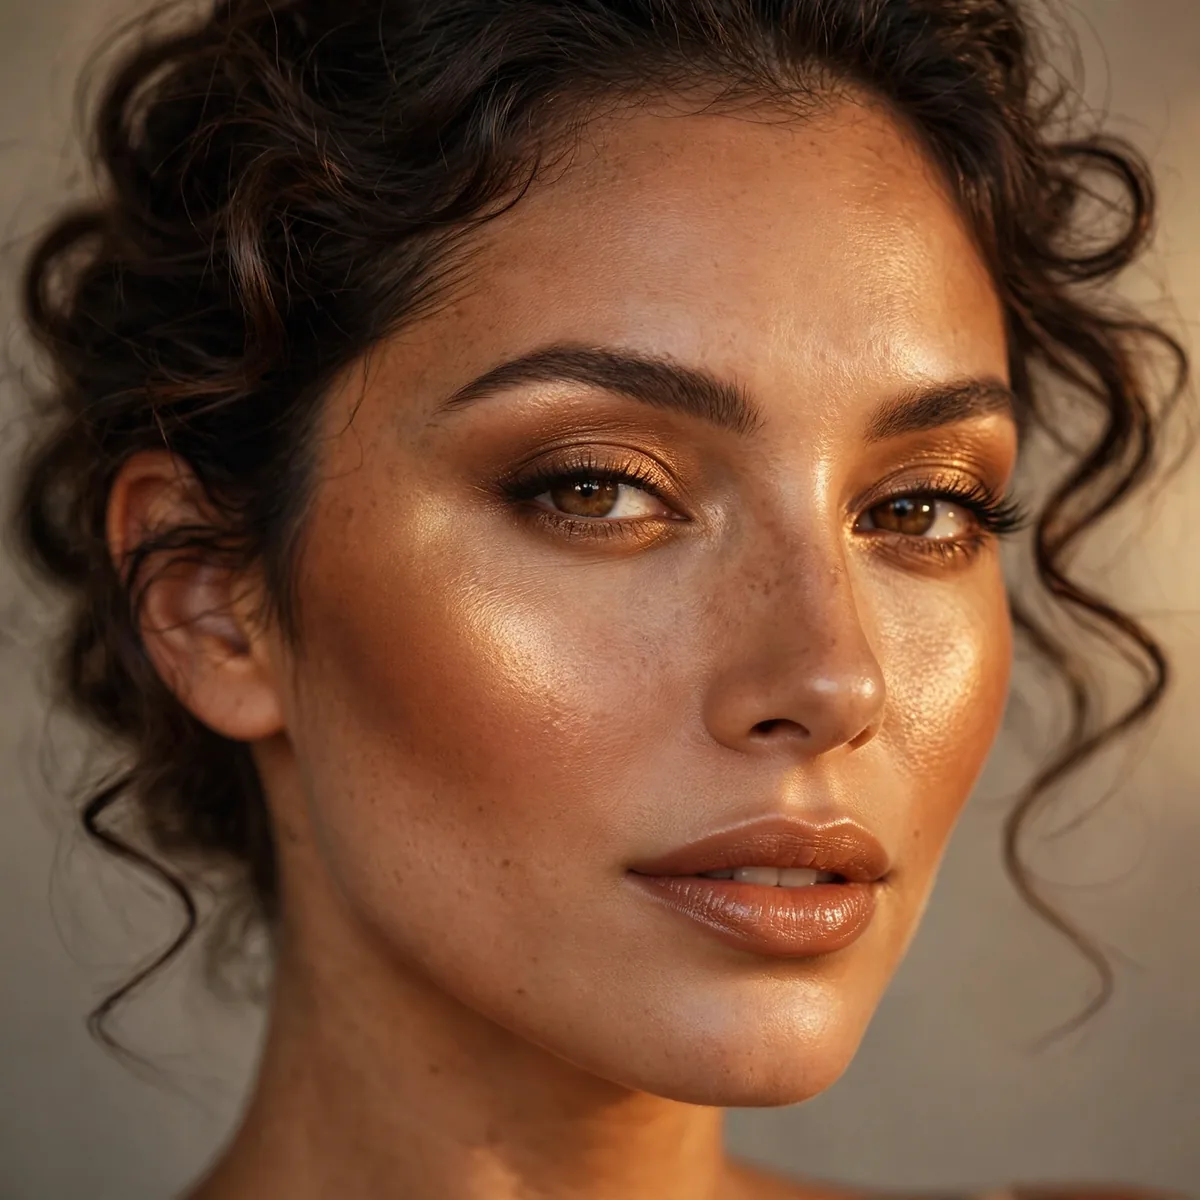
Bronzed goddess cheeks take contouring's structure and boho's warmth and land somewhere sun-drenched in between. Instead of cool sculpting shades, you use a warm matte bronzer — two shades deeper than your skin — swept in a figure-three along the temples, under the cheekbones, and along the jawline. Then a shimmery golden highlighter goes on top of the cheekbones, catching light with every turn of your head. It's contour, but make it vacation.
The boho difference is in the blending and the finish. Use a big, fluffy brush and blend until there are no visible edges — bronzed goddess should look like a tan, not like makeup. The bronzer should have a warm, reddish undertone rather than a gray one; think terracotta and caramel rather than taupe. On the apples of the cheeks, layer a warm peach blush over the bronzer for that lit-from-within flush that makes the whole face look alive.
This look is universally flattering because warmth is universally flattering — it mimics the way skin actually looks after time in the sun. On fair skin, build the bronzer slowly to avoid muddiness; on deep skin, choose a rich bronze with golden shimmer that shows up luminously rather than ashy. Pair it with a glossy nude lip and brushed-up brows, and the whole face glows with health. It's the makeup equivalent of golden-hour lighting, available on demand.
For a full-day glow, layer cream bronzer under powder bronzer — the cream gives you the melded, skin-like base and the powder adds the sun-catching finish. Set with a dewy setting spray rather than a matte one; matte spray will flatten the luminosity you're building. Touch up with a pressed bronzer compact, pressing rather than sweeping, to revive the warmth without disturbing the base underneath.
Dusty Rose Bohemian Lips
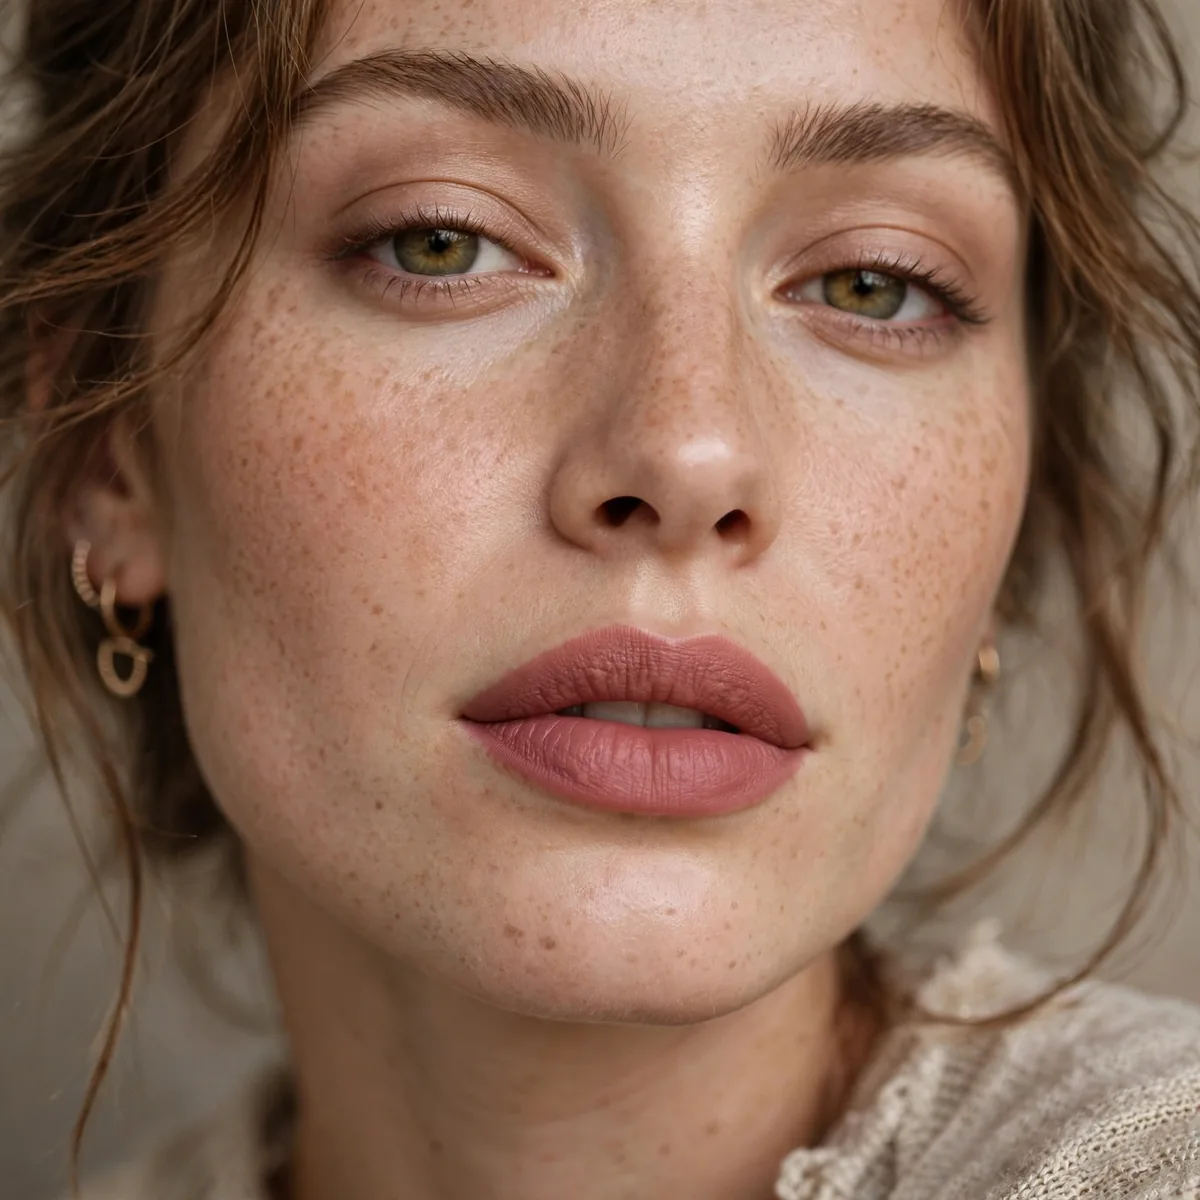
Dusty rose is boho's signature lip — romantic, muted, and effortlessly cool, like dried flowers pressed in a book. This look centers on a dusty rose lipstick or stain, applied straight from the bullet and then blotted down with a tissue for a soft, lived-in finish. The color should look like your lips, but deeper and duskier — the shade your lips turn after a glass of red wine, minus the wine.
The blotted application is what makes it boho rather than classic. Apply one layer, press your lips together, blot firmly with a tissue, then apply a second sheer layer just to the center of the lips and blend outward with your finger. This creates a gradient — deeper in the middle, softer at the edges — that looks bitten and natural rather than painted. A touch of clear balm over the top adds the juicy finish that keeps dusty rose from looking flat or dry.
Dusty rose flatters every skin tone because it's a muted neutral — on fair skin it reads romantic, on medium skin it reads natural, on deep skin it reads rich and velvety. Pair it with warm, glowing skin and soft brown eyeshadow for the full bohemian effect, or let it be the single statement in an otherwise bare face. It's also the rare lip color that looks good slightly faded, which makes it perfect for long festival days.
For staying power without stiffness, start with a lip stain in a rose tone as your base, then layer the dusty rose lipstick over it. The stain keeps color alive even as the lipstick wears off, so you never hit that dreaded ring-around-the-lips stage. Exfoliate lips beforehand with a sugar scrub — dusty matte shades show every flake, and smooth lips make the color look expensive.
Turquoise Bohemian Accent Liner
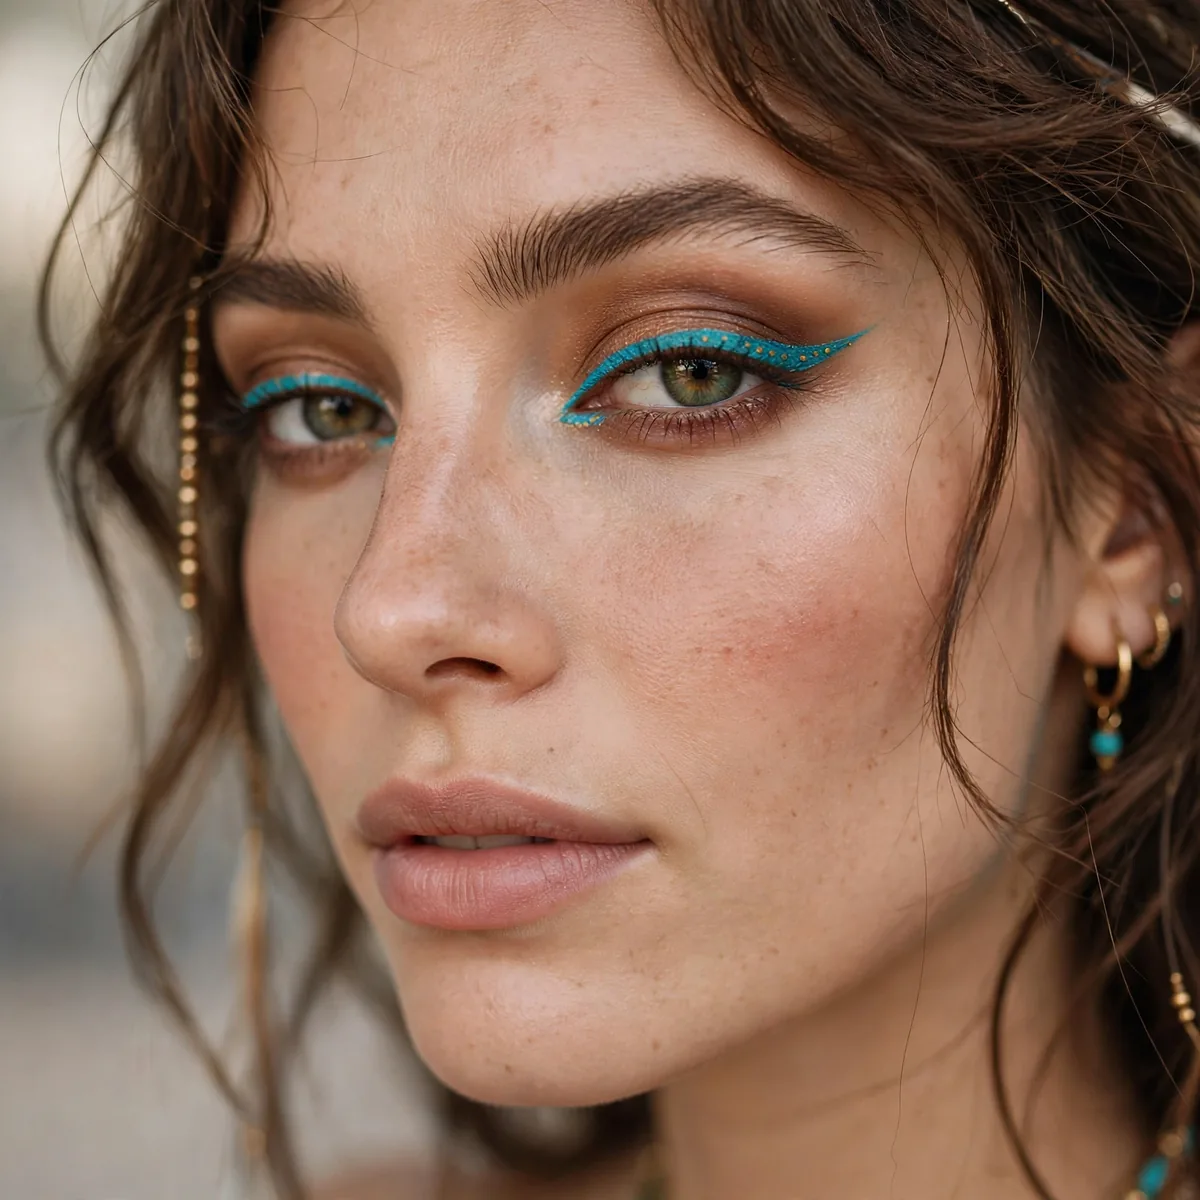
Every boho look needs one wild card, and turquoise liner is it — a flash of desert-sky blue along the lash line that turns an earthy face into something unforgettable. The trick is restraint: keep the rest of the face warm and neutral — terracotta lids, bronzed cheeks, nude lips — and let the turquoise be the single electric note. It's the jewelry of the face, and like good jewelry, it needs space to shine.
Application is simple but the placement matters. Line the upper lash line with a turquoise pencil or gel liner, keeping the line thin at the inner corner and slightly thicker toward the outer third. For a softer take, smudge the edges with a small brush so it reads as a haze of color rather than a graphic line. The lower waterline in turquoise is the bolder festival version — striking, but save it for after dark or it can overwhelm.
Turquoise flatters brown eyes spectacularly — the blue-green against warm brown irises creates a contrast that makes eyes look enormous. On blue eyes, it creates a tonal, mermaid-like harmony; on green eyes, it's pure magic. If turquoise feels too bright, try teal — same energy, slightly deeper and more wearable. The key is keeping the formula creamy and pigmented; a sheer turquoise just looks like a mistake.
For longevity, set the liner with a matching turquoise eyeshadow pressed over the top — this locks the color and intensifies it. Waterproof formulas are essential for festivals; sweat and turquoise liner are not friends unless the formula is bulletproof. Remove with an oil-based cleanser at night, because bright pigments can stain the delicate eye area if left to sit.
Sunset Ombré Eyeshadow
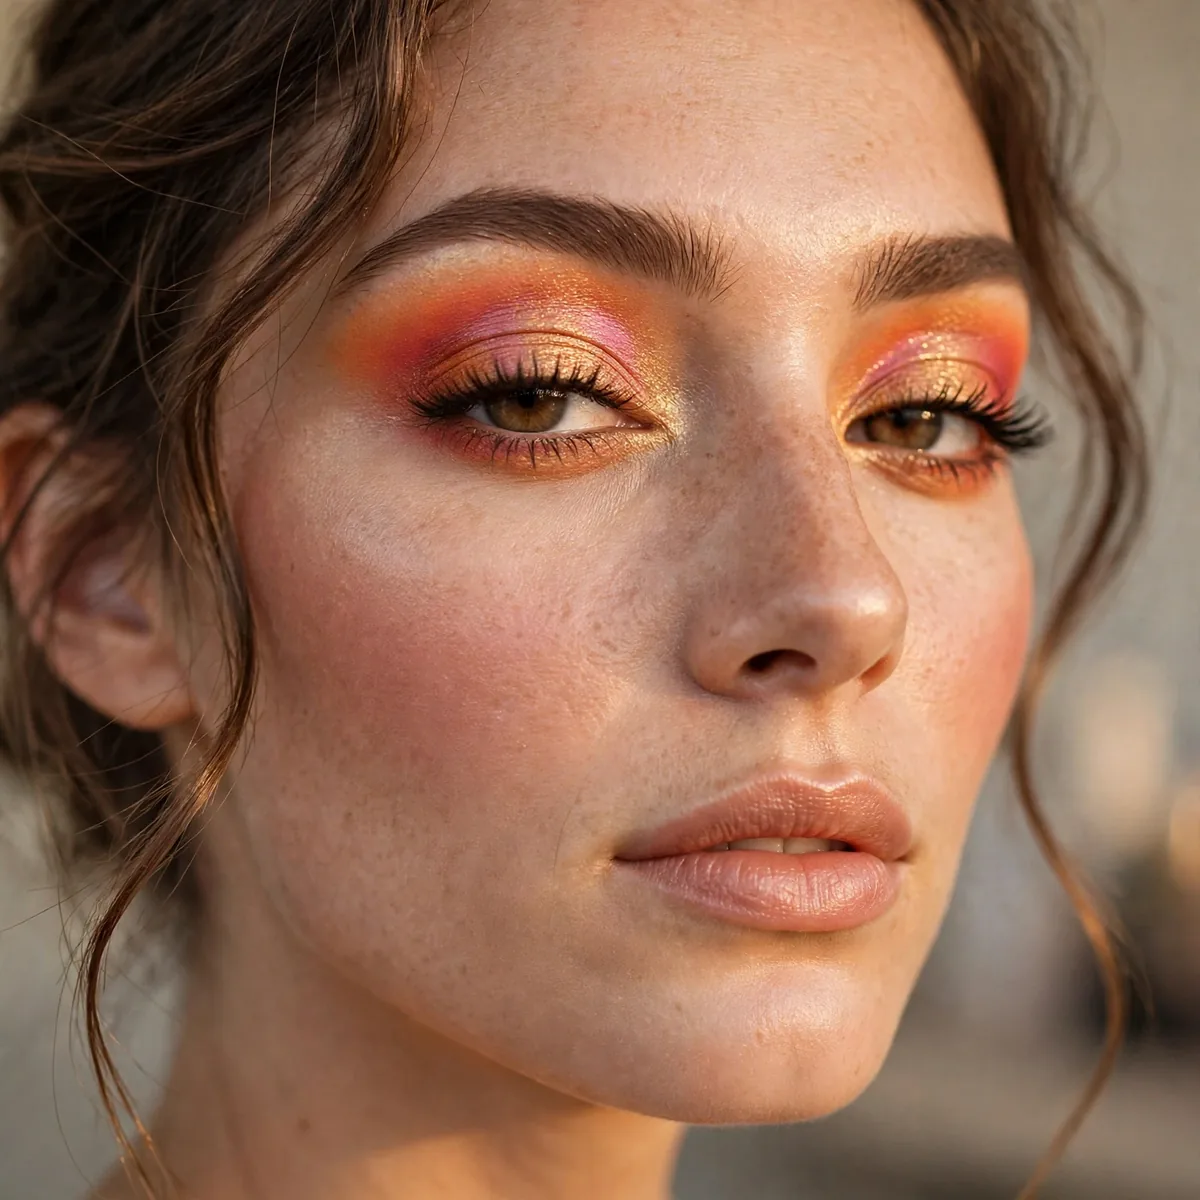
Sunset ombré eyeshadow paints an actual sunset across your lids — golden yellow at the inner corner melting into burnt orange through the middle and deepening to a dusky plum-rose at the outer corner. It's the most artistic look on this list, and the most rewarding: when the blend is right, your eyes look like they're holding the last light of day. The gradient should be seamless, with no visible lines between colors — just one continuous melt.
The technique is all about layering light to dark and blending in small circles. Start with the golden shade on the inner third, then press the orange into the middle third, overlapping slightly, then the plum-rose on the outer third. Blend the transitions with a clean fluffy brush using tiny circular motions — never back-and-forth windshield-wiper strokes, which create mud. Build in thin layers; three sheer layers blend better than one heavy one.
This look is made for warm skin tones and golden-hour events, but it can be adapted: on cool skin, swap the orange for a rosy copper and the gold for champagne. Keep the rest of the face simple — glowing skin, a nude lip — because the eyes are the entire story. Lashes should be defined but not heavy; a few coats of mascara or subtle individual falsies keep the focus on the color gradient.
For blendability, work over a tacky eyeshadow primer — dry primer makes shadows skip, tacky primer grabs pigment evenly. If the colors start looking muddy, you've over-blended; add a fresh tap of the brightest shade to the inner corner to restore the gradient's light. Photograph this look in natural light if you can — indoor lighting flattens the ombré, but daylight makes it sing.
Feathered Brows and Bare Skin
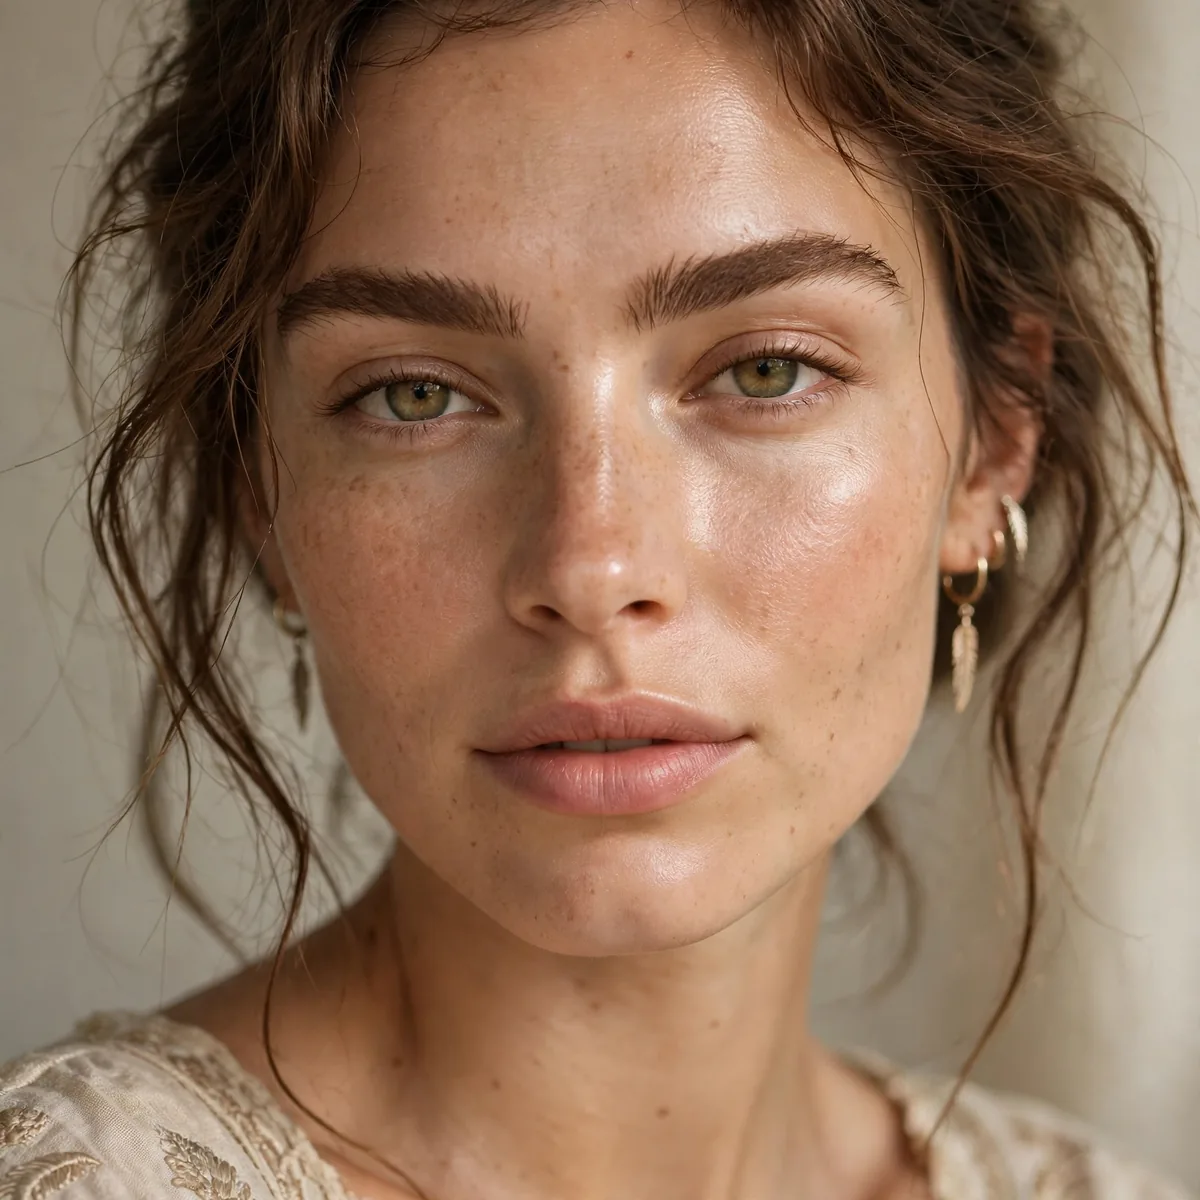
Sometimes the most boho look is the least makeup — feathered brows and genuinely bare, glowing skin. This is the no-makeup makeup perfected: brows brushed up and set with a clear or tinted brow gel so every hair stands feathery and defined, and skin prepped to look like skin, just better. The philosophy is radical in its simplicity: your face, on its best day, with nothing to hide behind.
Brow technique is everything here. Brush the brow hairs straight up with a spoolie, then use a fine brow pen to fill only the sparse spots with hair-like strokes — never a solid fill, which reads as done. Set with a strong-hold brow gel, pressing the hairs up and slightly outward for that laminated, feathery effect. The brows become the frame and the statement; everything else whispers. A brow that looks untouched but perfect is the hardest-working element in boho beauty.
Skin prep replaces foundation: a hydrating serum with hyaluronic acid, a dewy moisturizer, and a light-reflecting primer are your base. Spot-conceal only where needed — under the eyes, around the nose, on any blemishes — and blend the edges into nothing. A touch of cream blush on the cheeks and a tinted lip balm complete the look. The goal is skin that looks like it drinks water and sleeps eight hours, even if it does neither.
This look lives or dies on skincare, so the real work happens the night before: exfoliate gently, layer hydrating serums, and sleep on a silk pillowcase. In the morning, the makeup takes five minutes. It's also the most age-inclusive look on this list — feathered brows lift the face and bare glowing skin reads as confidence at every age. Boho at its purest is just you, well-rested and sun-kissed.
Gold Leaf Inner Corner Glow
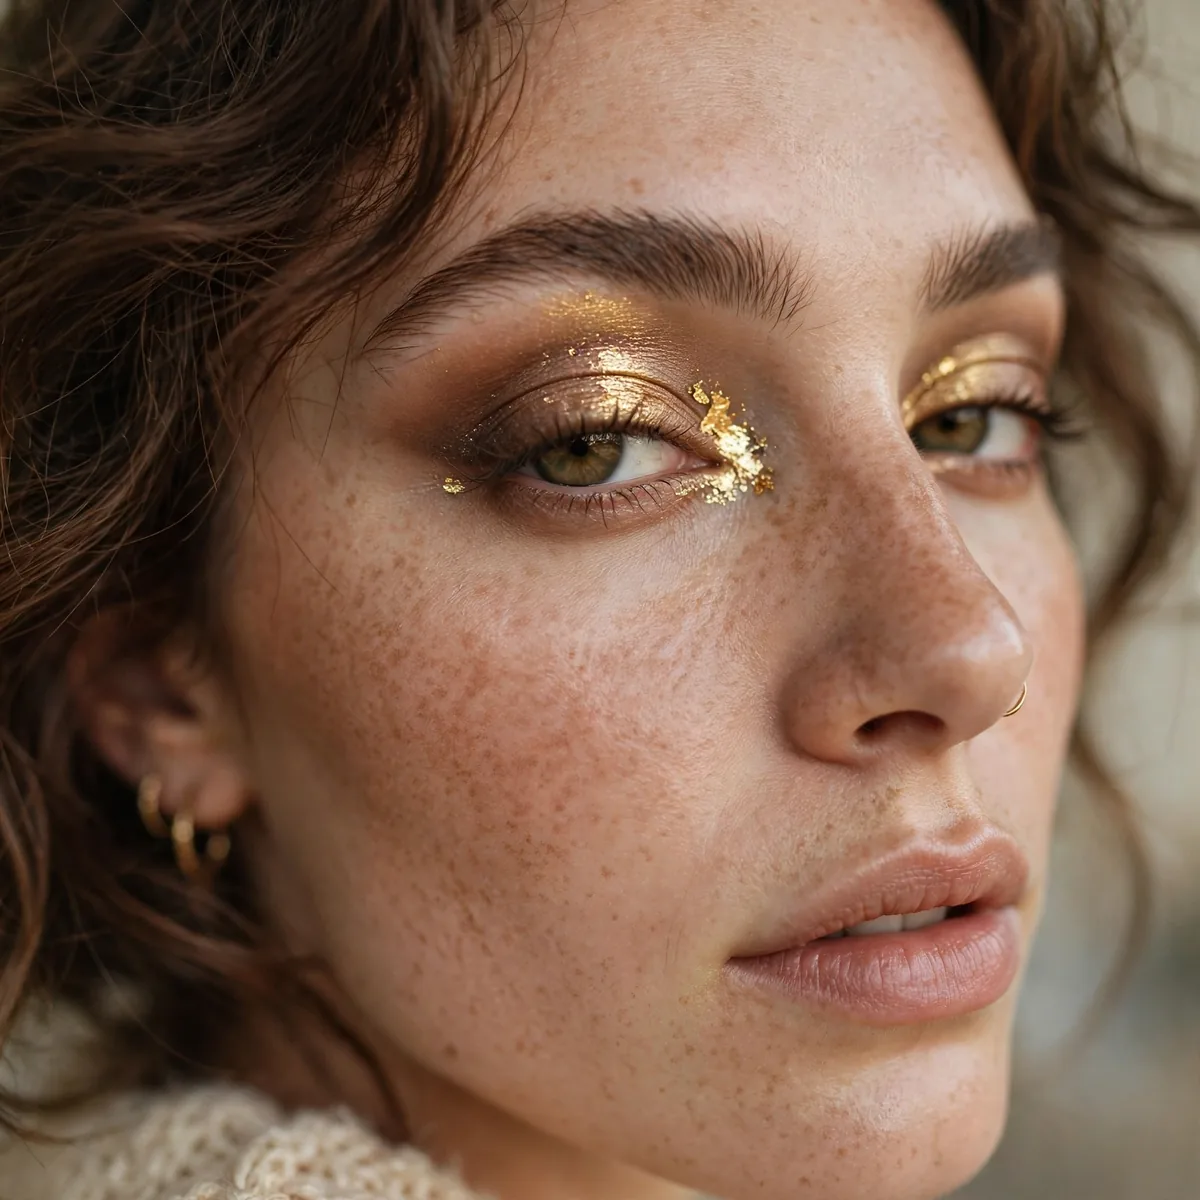
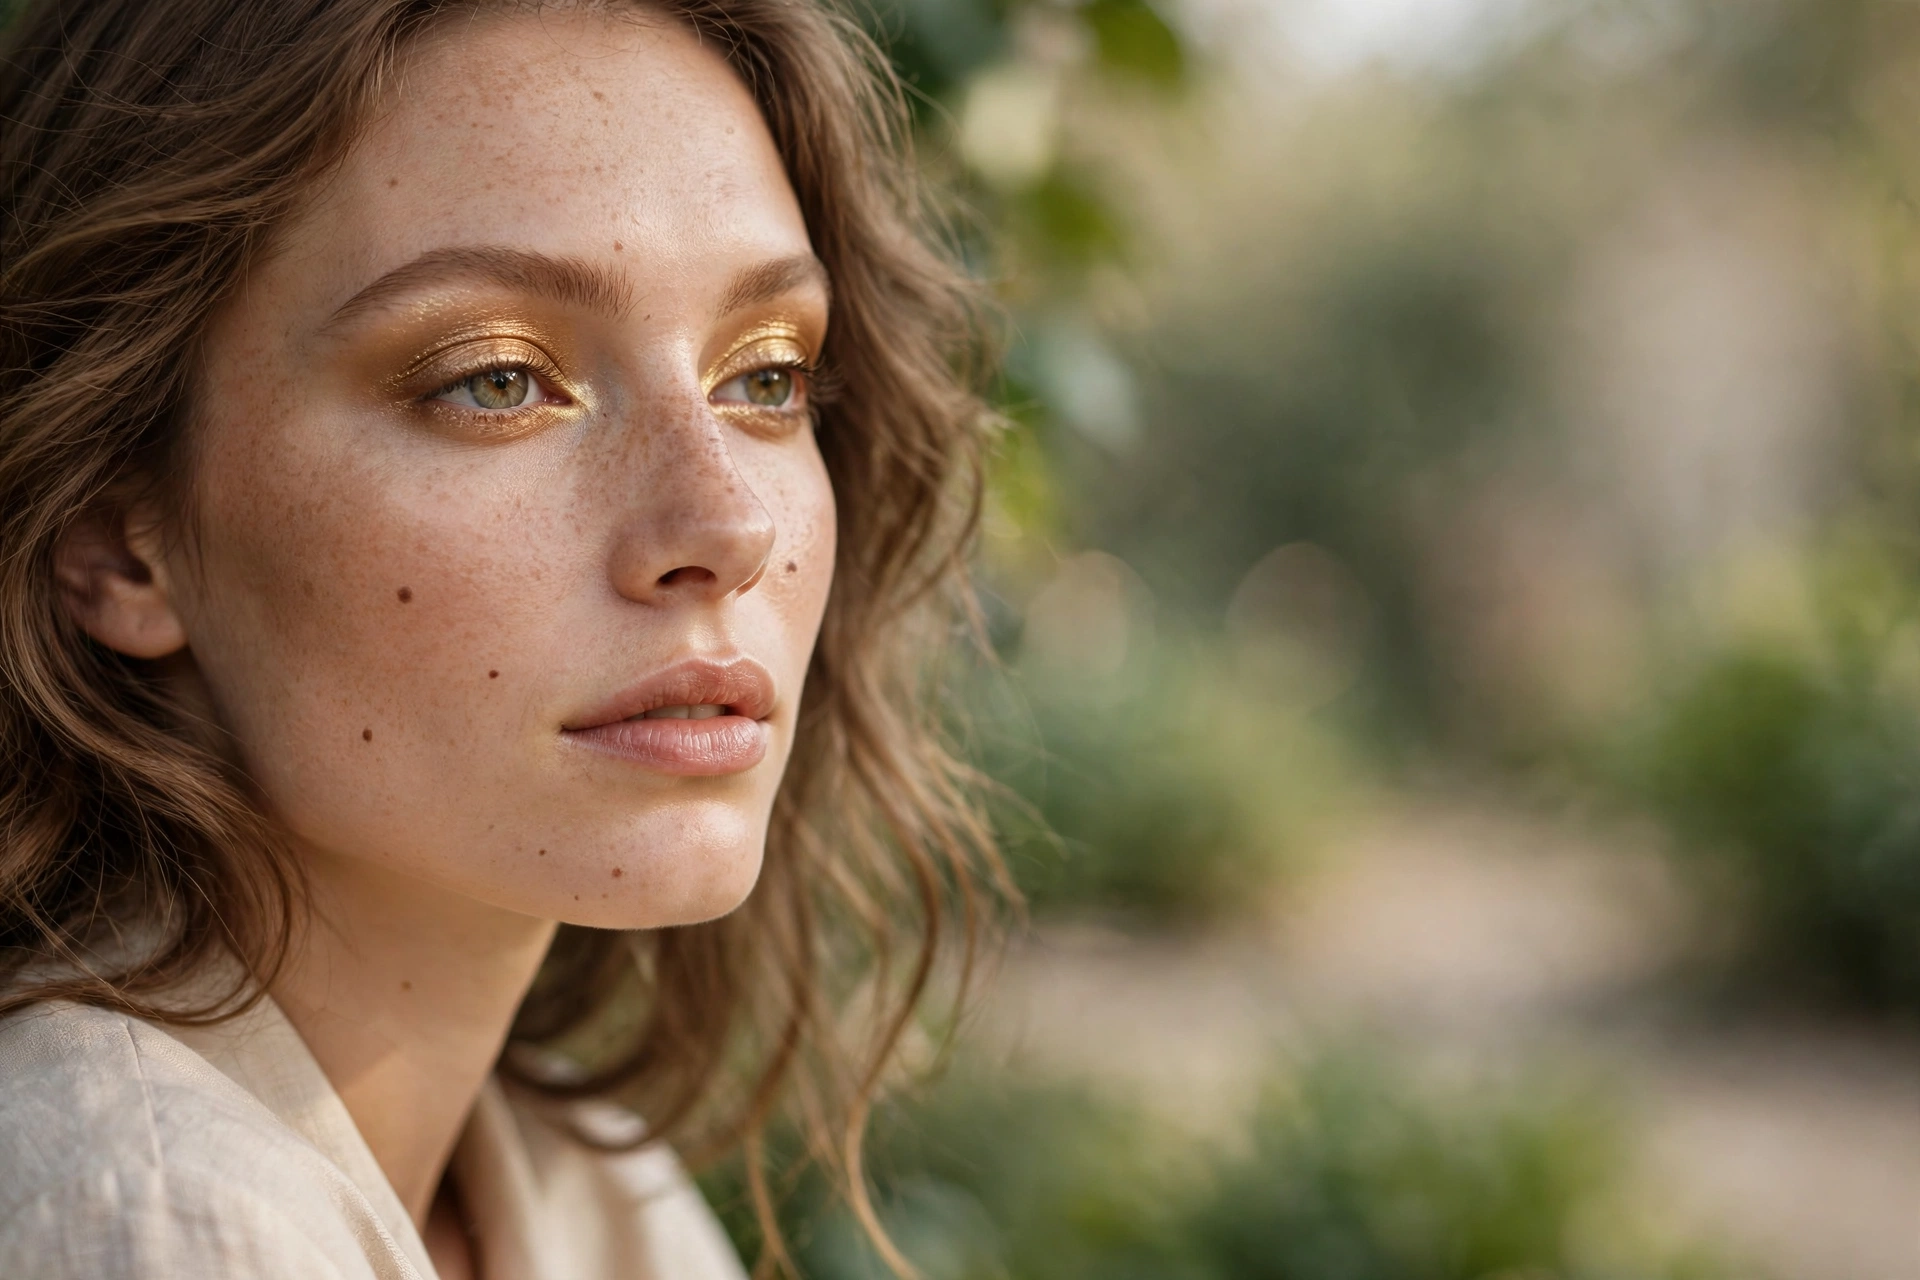
A touch of gold in the inner corner is boho's most versatile detail — it works on every eye look, every eye color, every occasion. This look builds a soft, earthy eye (think warm brown or terracotta buffed across the lid), then presses a molten gold shimmer into the inner corner and along the first third of the lower lash line. The effect is candlelit: eyes that look bright, awake, and touched with something precious.
The gold should be a true metallic, not a glitter — finely milled shimmer that reflects light smoothly rather than sparkling. Apply it with a damp small brush or your fingertip, pressing rather than sweeping, to get maximum payoff. The damp application intensifies the metallic finish to a near-foil effect. Blend the outer edge of the gold into the lid shade so there's no harsh line; it should look like the gold is emanating from the corner of your eye.
This detail flatters everyone because inner-corner brightness is universally eye-opening — it counteracts darkness and makes eyes look larger and more awake. On deep-set eyes it's transformative; on close-set eyes, keep the gold tight to the corner to avoid emphasizing the closeness. For a festival upgrade, extend the gold into a thin line along the entire lower lash line, or layer a gold glitter just in the very corner over the shimmer base.
To make the gold last, apply it over a slightly tacky concealer or glitter primer — metallics need grip. Avoid applying gold over a fully set powder base, which makes it look patchy. At the end of the day, metallics can migrate, so check the inner corner after a few hours and press any wanderers back into place with a clean fingertip. Small detail, big magic.
Earthy Smoky Eye in Espresso
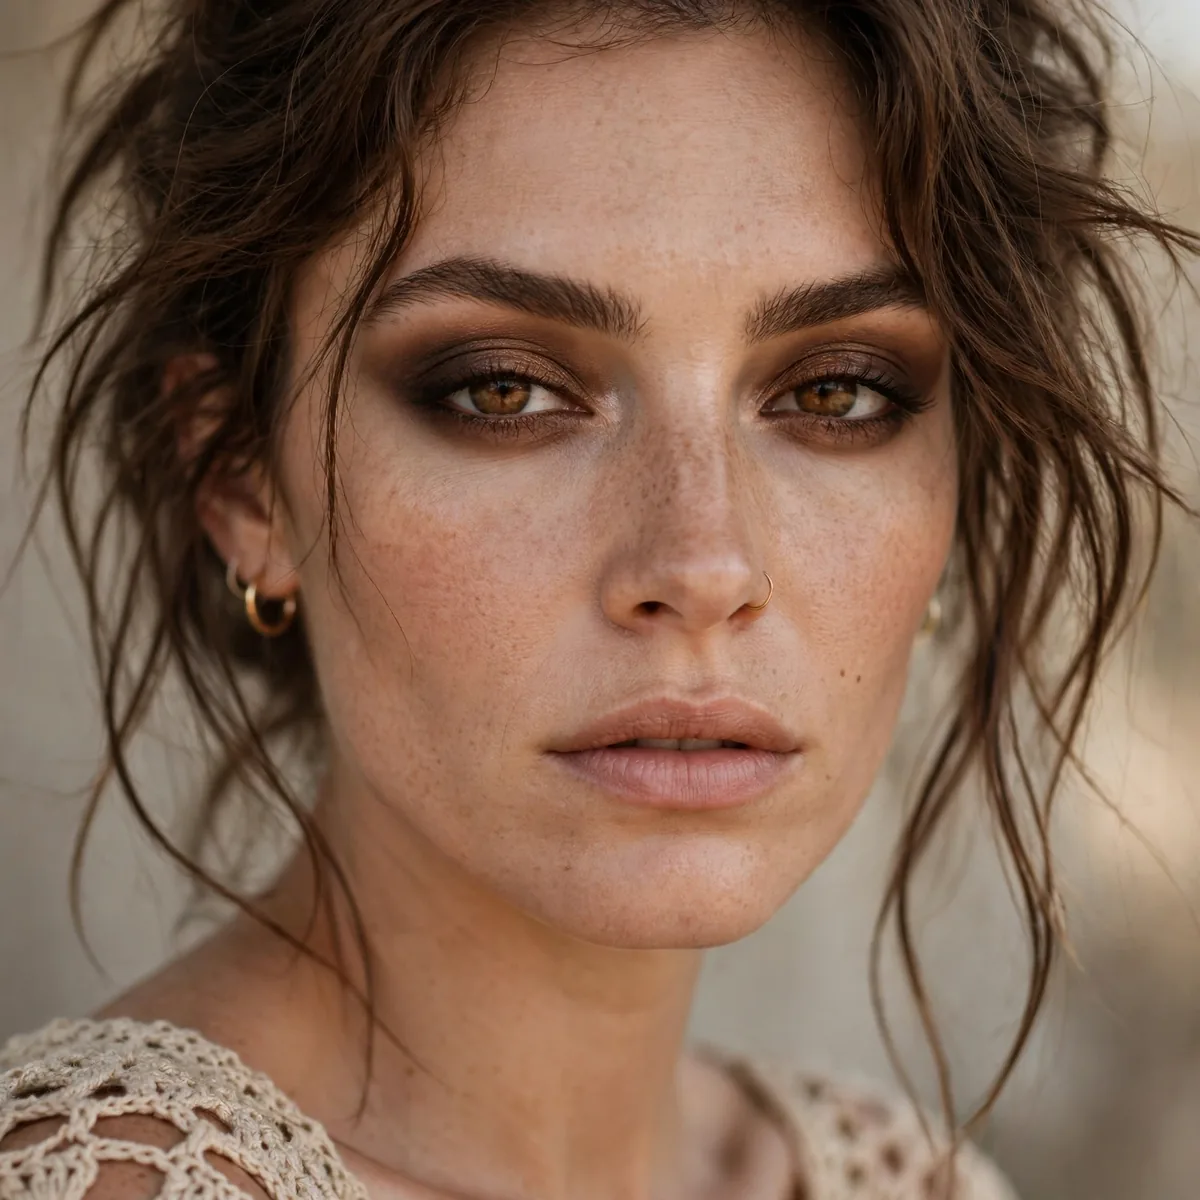
The boho smoky eye trades black for espresso — all the sultry depth, none of the harshness. This look builds a soft, diffused smoky eye using warm browns: a medium espresso across the lid, a deeper chocolate in the outer corner and crease, and a warm caramel to blend the edges into the brow bone. The result is a smoky eye that looks like it was created by firelight — warm, mysterious, and infinitely more wearable than the black version.
The technique is classic smoky-eye layering with a boho softness. Start with a cream brown base or a tacky primer, then pack the espresso onto the lid with a flat brush. Use a fluffy blending brush to work the chocolate shade into the outer V and crease, then blend the edges with the caramel shade using small circular motions. The lower lash line gets the espresso smudged along it and softened — this is what makes it smoky rather than just dark.
Espresso flatters every eye color: it makes blue eyes look like winter sky, green eyes look like forest, and brown eyes look like melted chocolate. It's also more forgiving than black on mature eyes — the warm tones don't emphasize fine lines the way harsh black can. Pair it with a nude, glossy lip and glowing skin; the contrast between the intense eyes and the soft everything-else is pure boho glamour.
For a smoky eye that lasts, the primer is non-negotiable — warm browns crease just as fast as blacks on oily lids. Set the cream base with a matching powder before layering, and keep a clean blending brush handy for softening any harsh edges throughout the night. If fallout lands on your cheeks, don't wipe — press a piece of tape lightly over it to lift the pigment without disturbing your base.
Coral Blush Draping
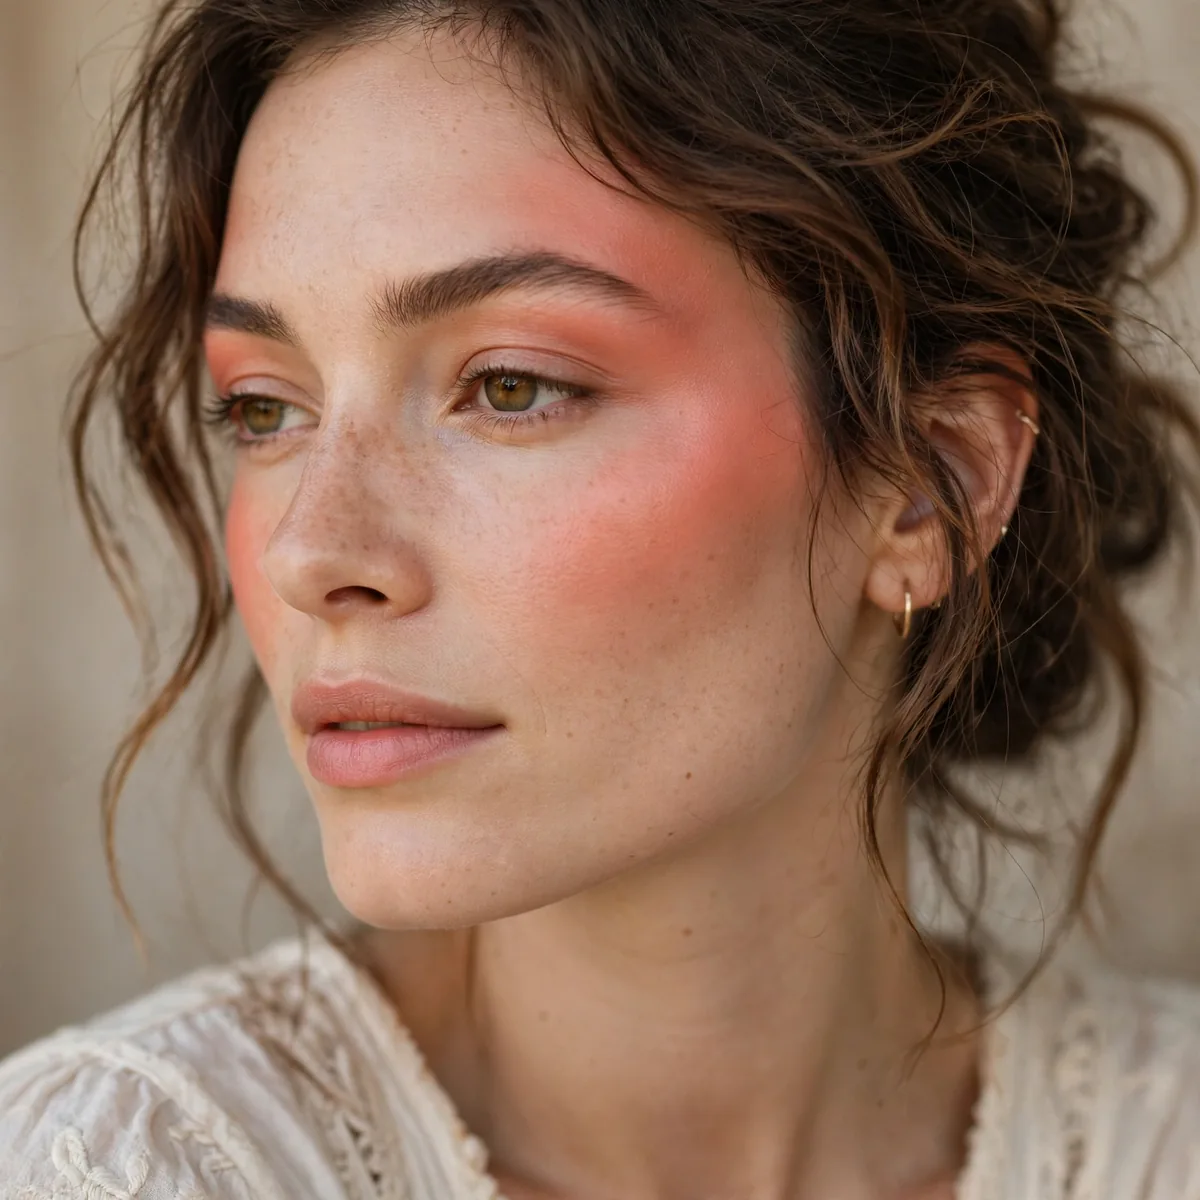
Blush draping is the 1970s technique boho was born for — blush swept from the apples of the cheeks up along the cheekbones toward the temples in one continuous, sculpting flush. In coral, the effect is pure sunset: warm, vibrant, and alive. This isn't the shy dab of blush of the minimalist era; it's blush as a statement, draped like fabric across the face. And on the right skin, it's breathtaking.
Technique: smile slightly to find the apples, then sweep a coral cream blush upward along the cheekbone toward the temple in one fluid motion, using a dense brush or your fingers. The color should be most intense on the apple and diffuse as it travels up — that's the draping gradient. Layer a powder blush in a matching coral over the top to set it and add dimension.
Coral flatters warm and neutral skin tones most dramatically, but there's a coral for everyone — peachier corals for fair skin, true corals for medium, and rich tangerine-corals for deep skin. This look pairs with bronzed skin and a glossy nude or coral lip; the monochrome warmth is the point. It's bold, so keep the eyes soft — a wash of bronzer across the lids and mascara is all you need. The blush is the star.
Cream-first layering is essential for draping; powder alone looks stripey. After applying, check your work in natural light — indoor lighting can make draped blush look heavier than it is. If you've gone too far, don't remove; press a damp sponge over the top to sheer it out. The sponge melts the edges into skin while keeping the color, which is exactly the soft-focus finish draping demands.
Bitten Berry Festival Lips
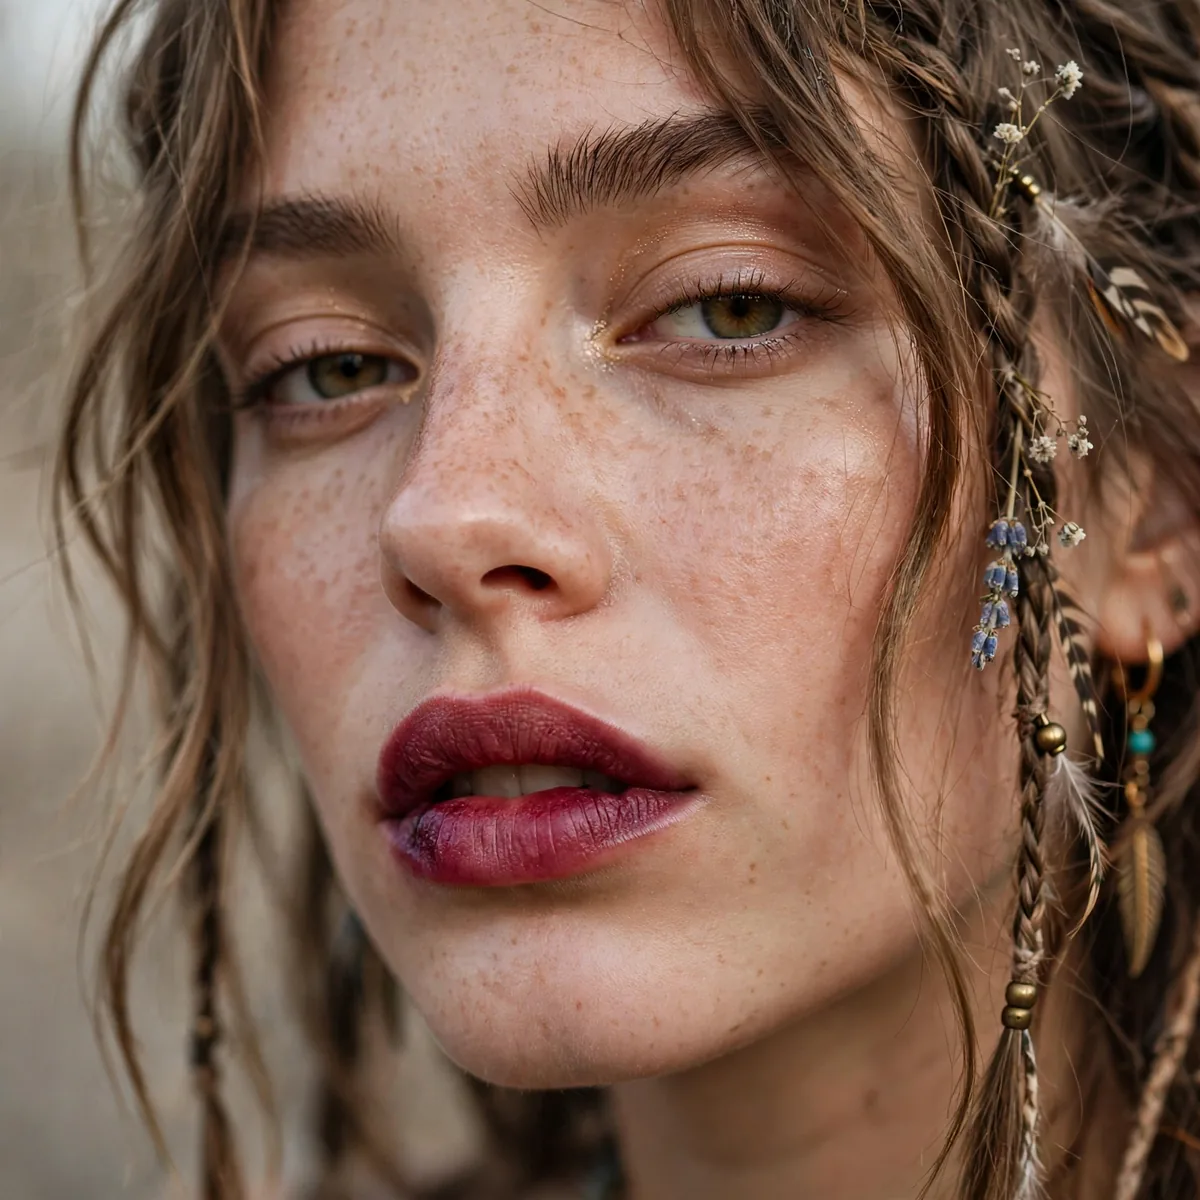
Bitten berry lips look like you've been eating dark cherries all afternoon — a deep berry stain concentrated in the center of the lips and fading softly toward the edges. It's the boho lip for when dusty rose feels too sweet: moodier, juicier, and a little bit wild. The stain finish is key — it should look absorbed into the lips, not sitting on top of them, like color that comes from within.
Achieve it with a berry lip stain or a highly pigmented tint: apply generously to the center of both lips, then use your finger to press and blend the color outward, fading it toward the lip line. The edges should be soft and undefined — no lip liner, no sharp borders. Blot once, then add a second layer just to the very center for that just-bitten depth.
Berry flatters every skin tone — it's one of makeup's universal shades — but the undertone matters: blue-based berries suit cool skin, while warmer, almost-plum berries suit warm skin. This lip pairs with minimal eyes (mascara and a wash of bronzer) and glowing skin; the lips carry the whole look. It's also the most kiss-proof, eat-proof, dance-all-night lip on this list, because stains fade evenly rather than wearing off in patches.
Prep is everything with stains: exfoliate lips well, because stain grabs onto dry patches and looks patchy. Apply a thin layer of lip balm first, let it absorb for two minutes, then blot — this fills in fine lines without blocking the stain. Carry the stain for touch-ups; unlike lipstick, you can reapply stain without a mirror and it still looks perfect. That's festival practicality at its finest.
Desert Rose Monochrome Makeup
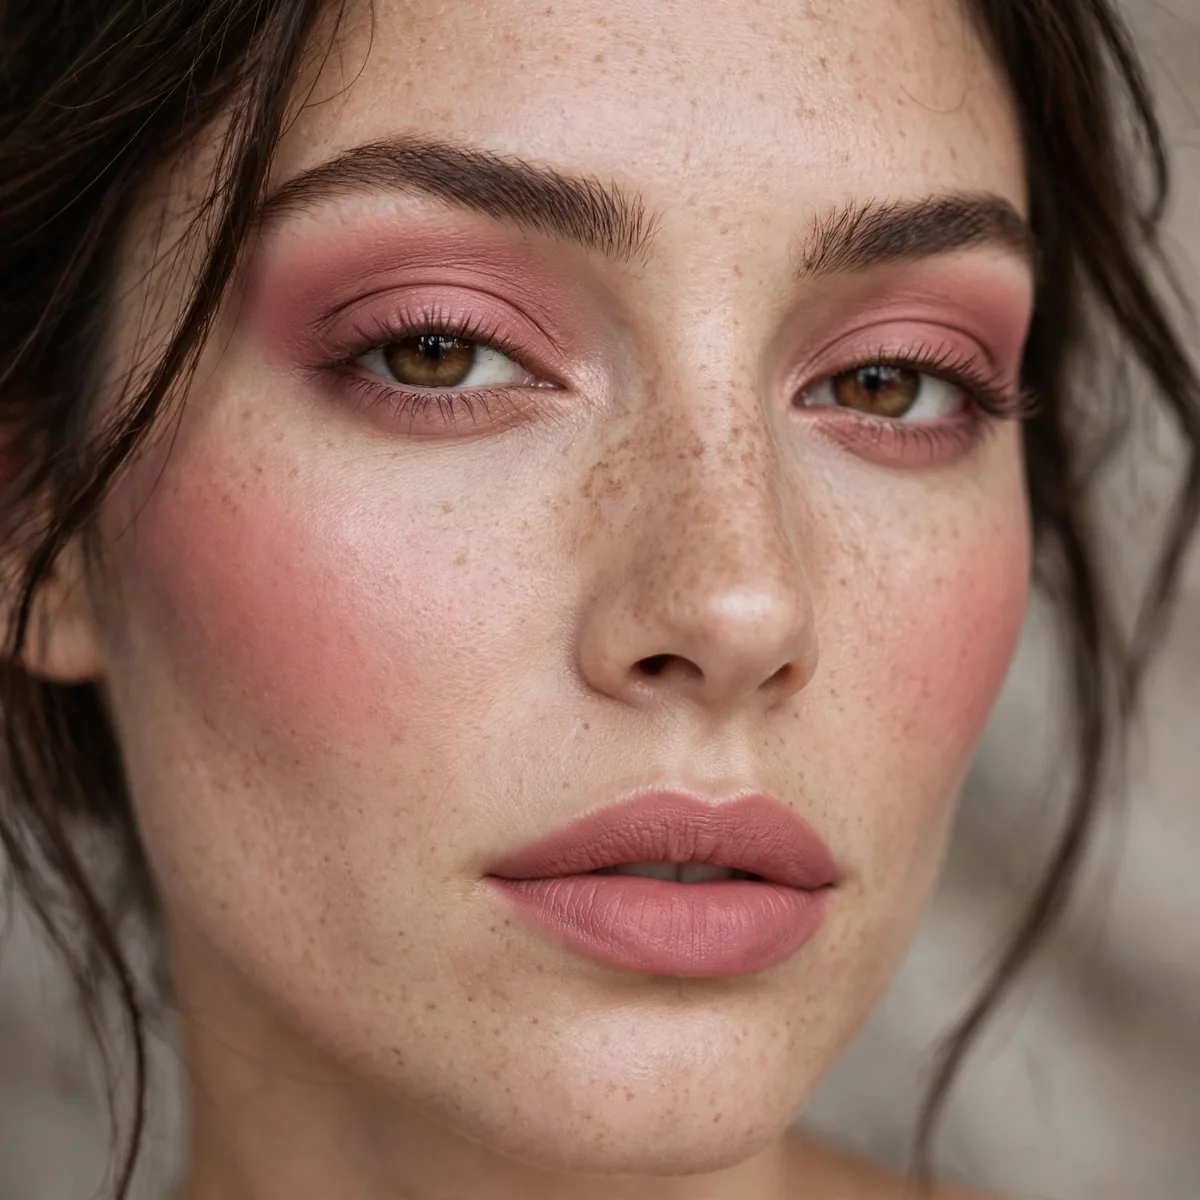
Monochrome makeup — one shade worn on eyes, cheeks, and lips — is boho minimalism at its most chic, and desert rose is the perfect shade for it. This look uses a single dusty rose cream product across the entire face: pressed onto the lids, melted into the cheeks, and patted onto the lips. The result is a harmonious, pulled-together flush that looks intentional and artistic, like a watercolor painting of a face.
The single-product approach is what makes this so achievable. Use a multi-stick or a cream blush in desert rose: pat it onto the lids with your finger and blend the edges with a fluffy brush, press it into the apples of the cheeks and blend upward, then press it onto the lips and top with balm. The same tone repeated across the face creates a cohesion that separate products can't match.
Desert rose suits fair to medium skin tones beautifully; on deeper skin, choose a richer mauve-rose to get the same monochrome effect with enough pigment to show. This look is endlessly versatile — it works for a daytime wedding, a dinner date, or a festival, depending on how intensely you build it. Pair it with feathered brows and glowing skin, and the monochrome flush becomes the entire statement.
Because you're using one cream product everywhere, longevity comes from setting strategically: a whisper of translucent powder over the cheeks (not the lids or lips) keeps the color in place without killing the dewiness. Carry the multi-stick for touch-ups — one product refreshes the entire face in thirty seconds. It also photographs beautifully, since the repeated tone creates a visual harmony that looks like the world's most flattering filter in natural light.
Shimmering Bronze Lids
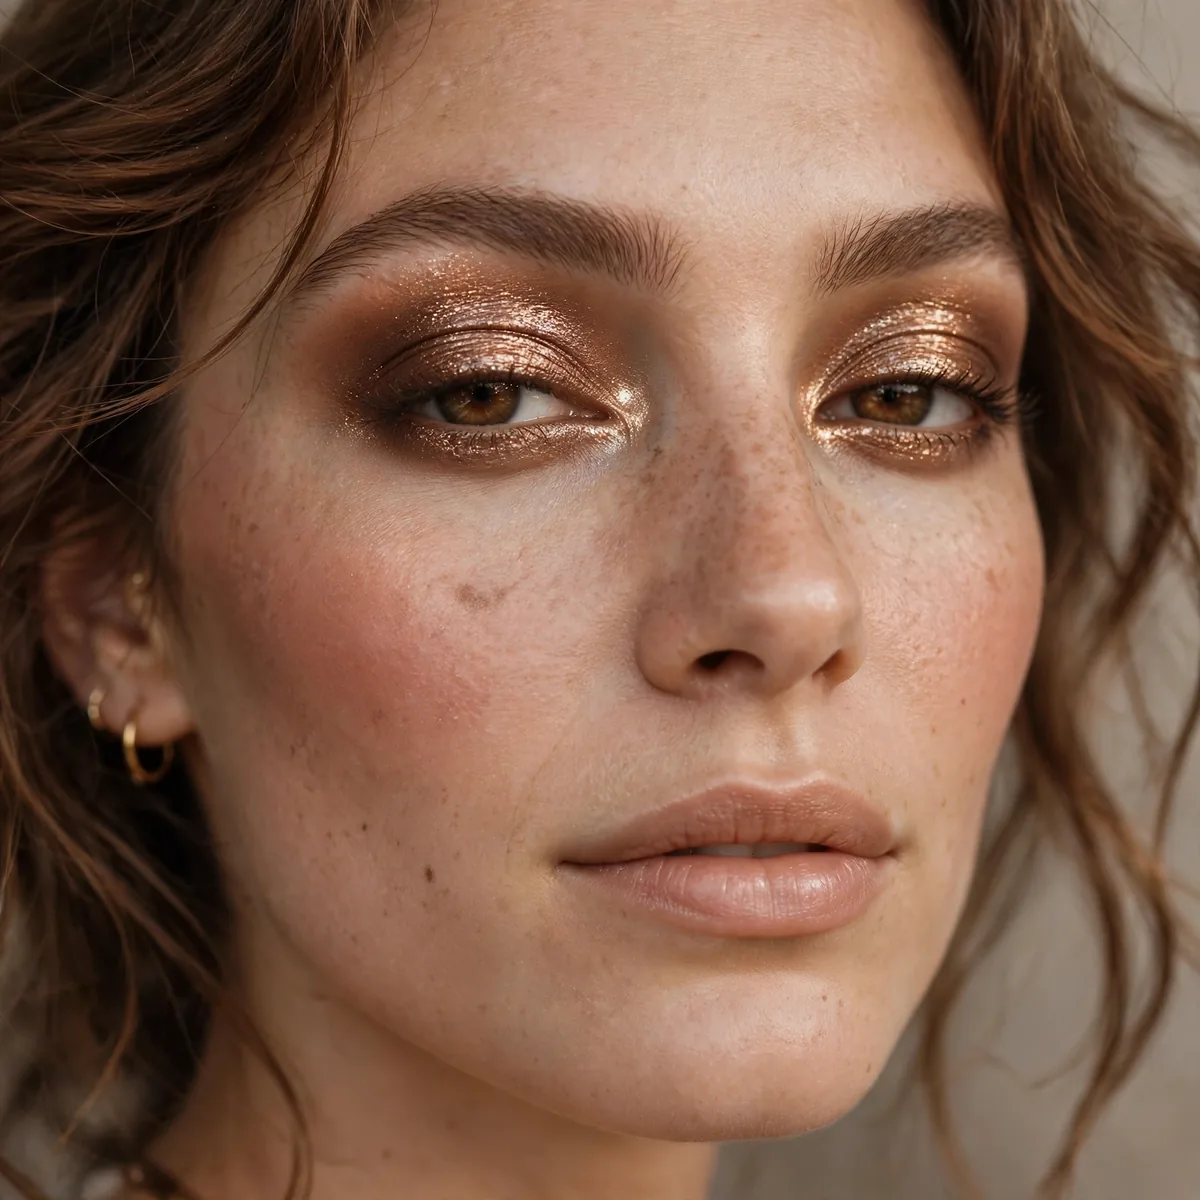
Shimmering bronze lids are boho's red-carpet moment — molten metallic bronze swept across the entire lid for eyes that look dipped in precious metal. Unlike the soft terracotta wash, this is unapologetic shine: a high-shine bronze that catches light with every blink. It's the eye look for golden-hour weddings, desert parties, and any night you want to look like the most radiant person in the room.
The key is the formula: a metallic cream shadow or a foiled powder applied with a damp brush. Pat the bronze onto the lid with your finger or a flat brush, pressing firmly to build the metallic finish — sweeping sheers it out. Concentrate the most intense shine on the center of the lid, where it catches the most light, and blend the edges into the crease with a warm matte brown so there's no harsh line.
Bronze flatters every eye color, but it's especially stunning on green and hazel eyes — the warm metallic makes green irises look almost supernatural. On deeper skin tones, bronze reads as luminous rather than stark, melting beautifully into the complexion. Keep the rest of the face warm and glowing: bronzed cheeks, a nude glossy lip, and skin that shines. The whole look should feel like it's lit from within.
Metallics crease without a proper base, so use a tacky eyeshadow primer or a cream shadow base — the tackiness grips the metallic particles. Set the bronze with a light press of translucent powder just in the crease (not on the lid, which would dull the shine). For maximum impact in photos, the bronze center-lid placement catches camera flash like a spotlight.
Wildflower Pastel Eye Details
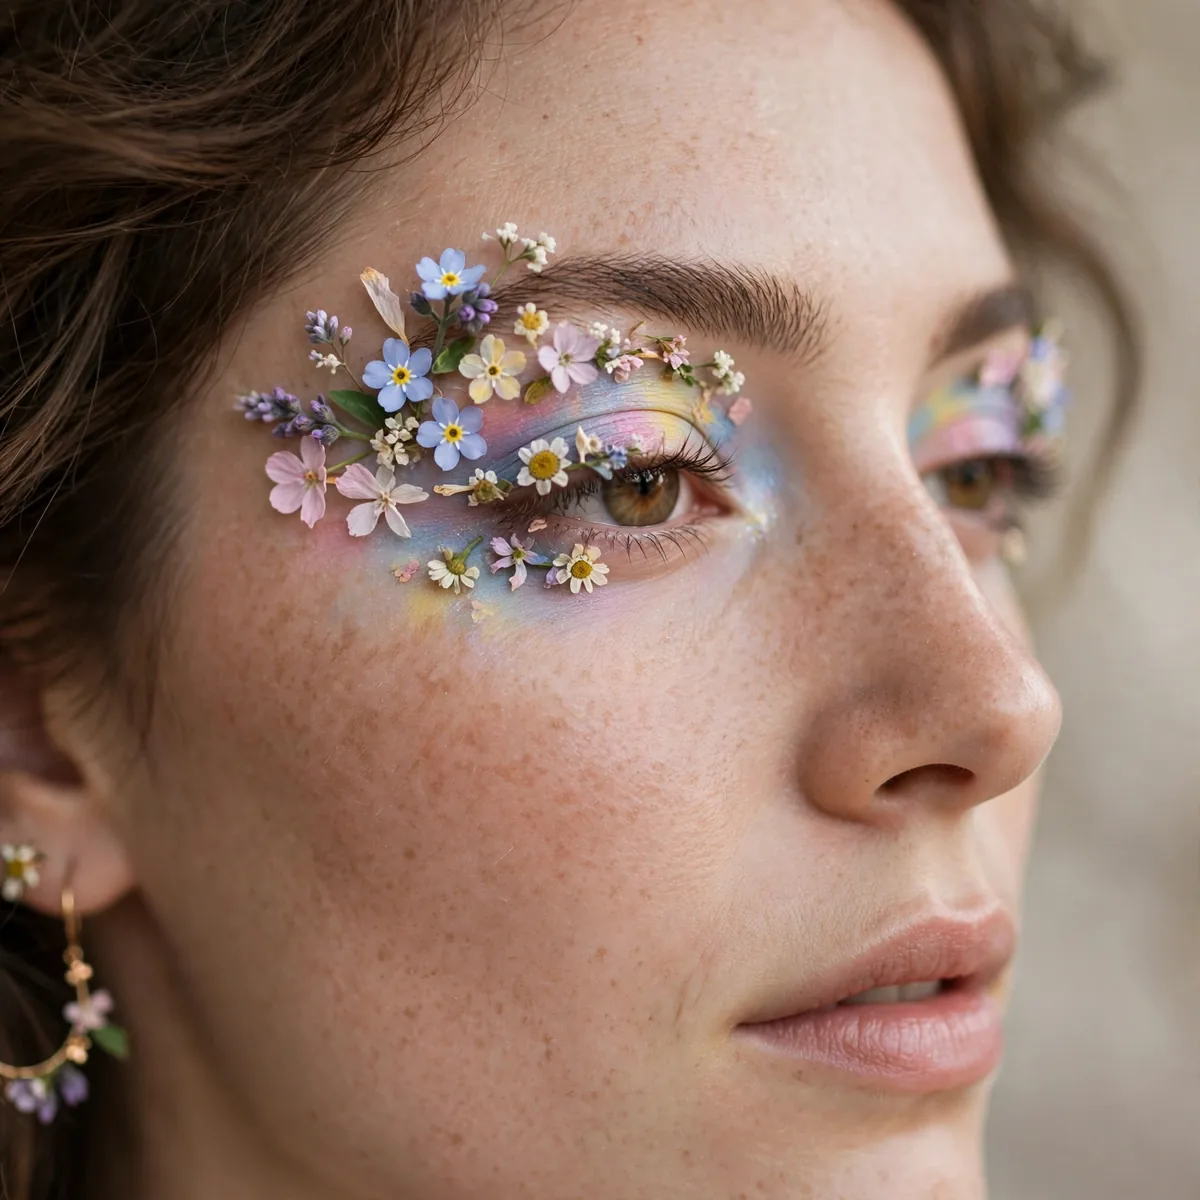
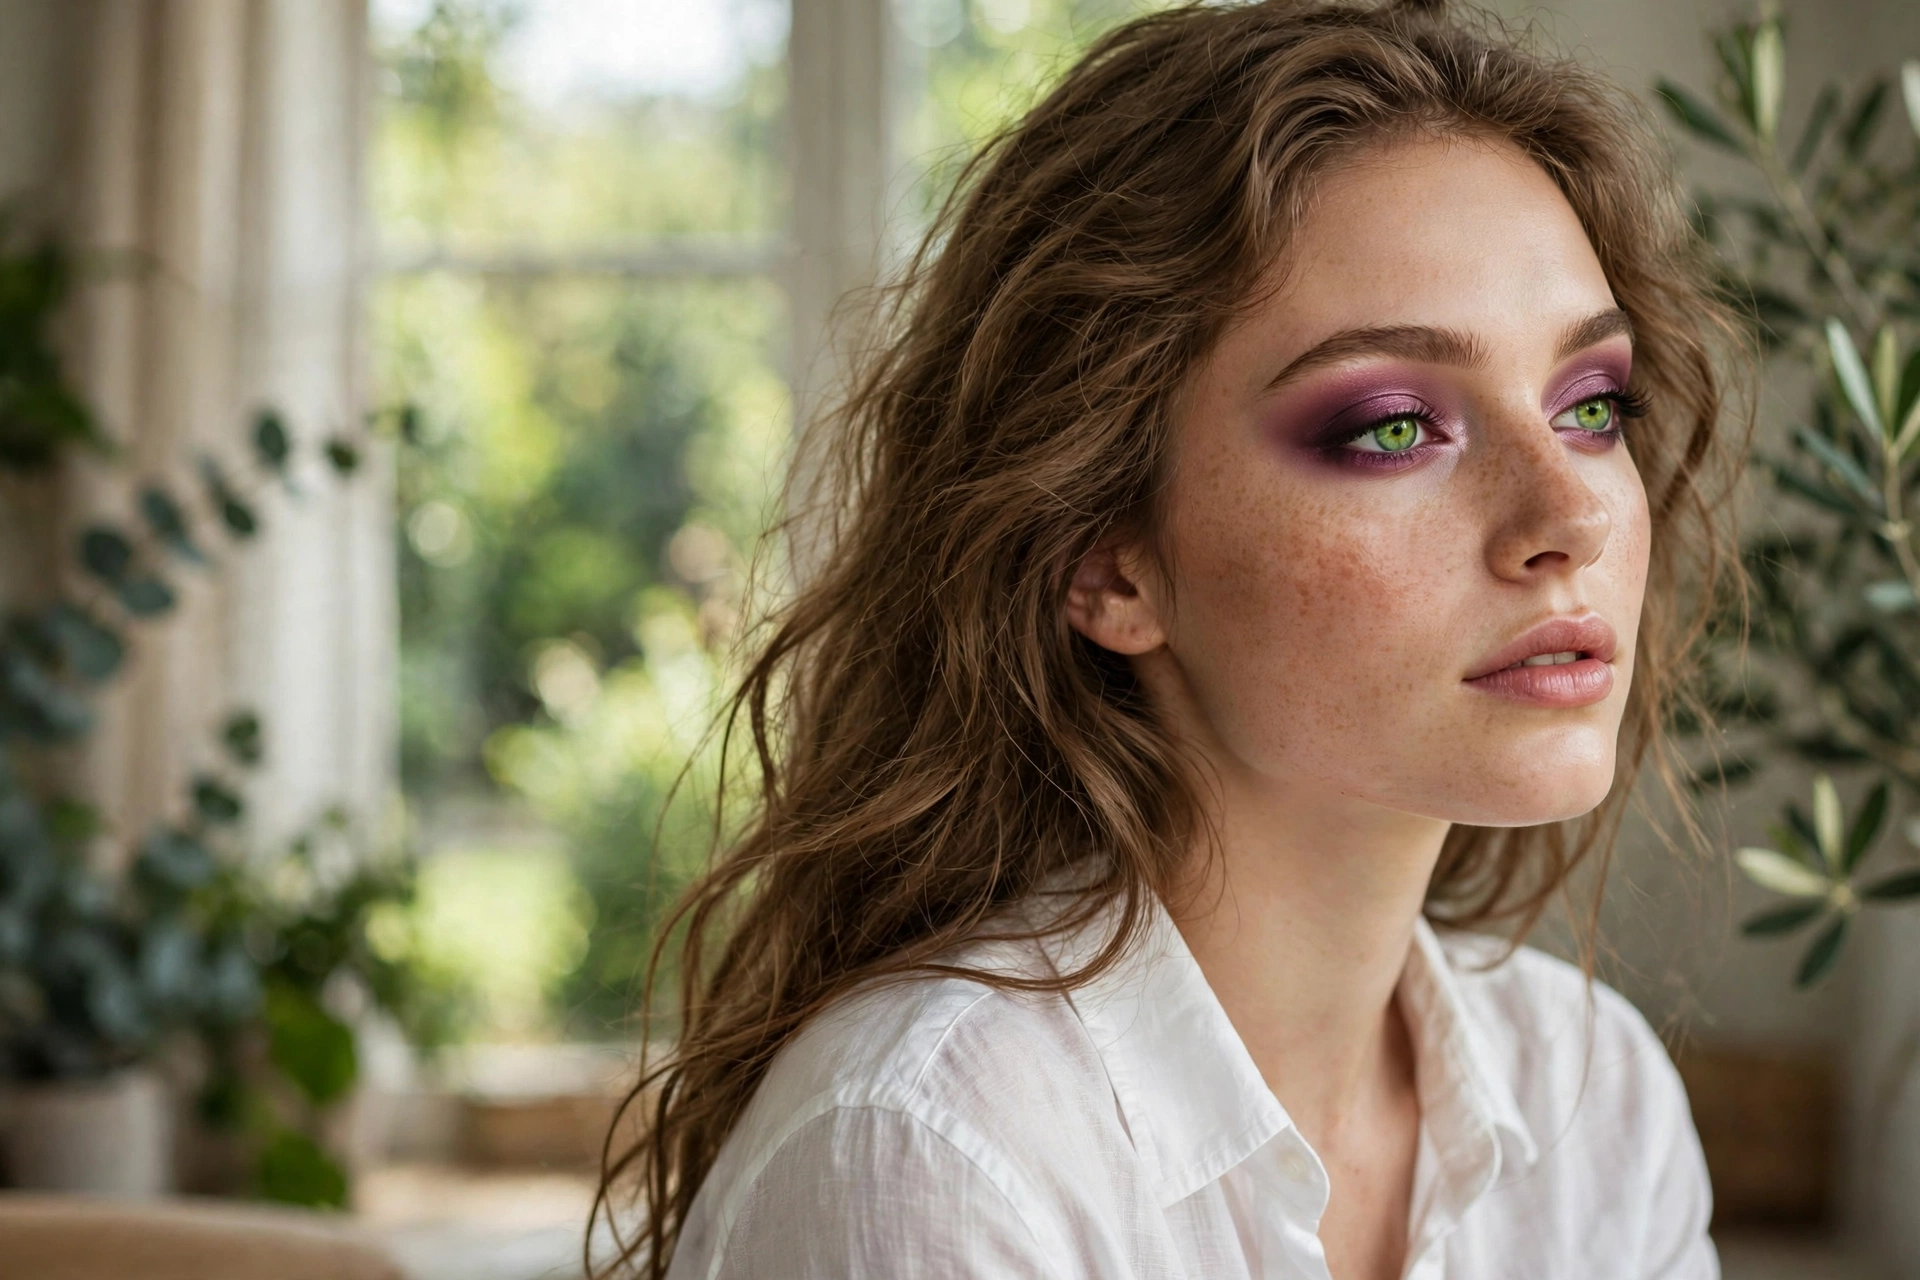
Wildflower pastel details are boho's most whimsical touch — tiny strokes of lilac, butter yellow, or petal pink placed where you'd least expect them. Think a flick of lavender along the lower lash line, a dot of yellow at the inner corner, or a wash of pink just under the brow bone. The base face stays earthy and neutral; the pastels are the wildflowers growing through it — unexpected, delicate, and utterly charming.
Placement is everything with pastels. They work best as accents, not as the main event: a thin line of lilac along the lower lashes, a small wing of peach at the outer corner, or a sheer wash of mint across the lid with earthy tones in the crease. Use a small, precise brush for lines and dots, and keep the pastel pigmented — sheer pastels on skin just look like nothing.
This is the most creative look on the list, and the most personal — choose pastels that speak to you. Lavender flatters green eyes, butter yellow makes brown eyes glow, and petal pink is universally flattering. It works for festivals, concerts, and creative events where a little whimsy is welcome. Pair it with glowing skin and a nude lip; the pastels need a calm canvas to stand out against.
Pastels fade fast, so layer them over a white or nude eyeshadow base to make the colors pop and last. A white cream base underneath turns a sheer lilac into an opaque, vibrant accent. Set with a matching powder pastel, and avoid blending the pastel into the earthy tones — the crisp contrast between the two is the whole point. For the truly adventurous, tiny hand-painted details like a miniature flower at the outer corner take this from makeup to art.
Honey-Glazed Donut Skin
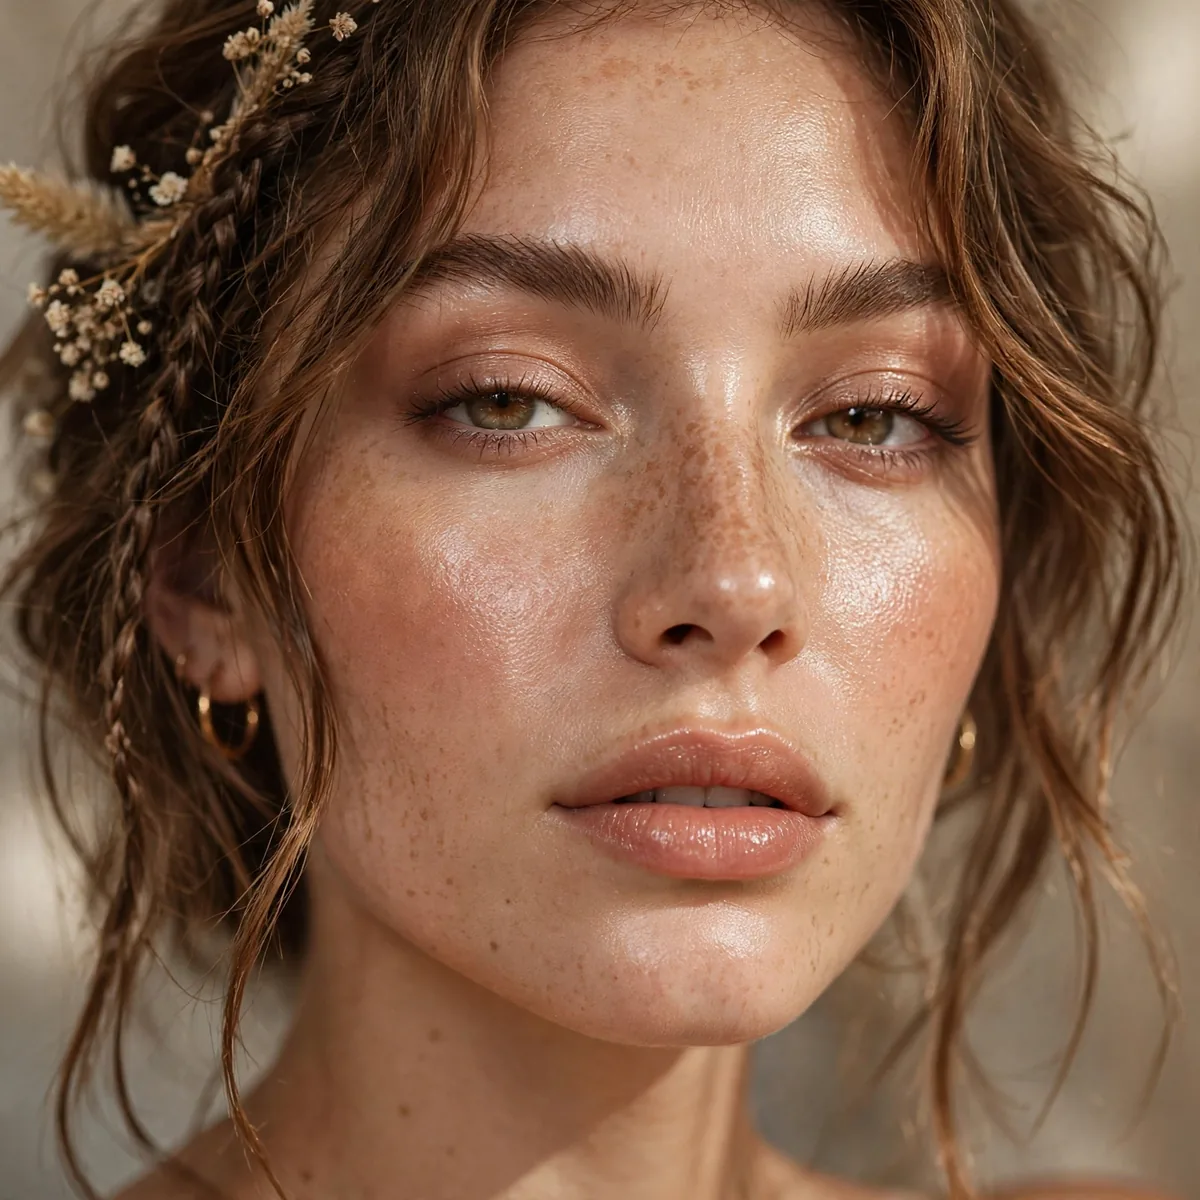
Honey-glazed donut skin is the dewiest look on this list — skin so luminous it looks coated in warm honey. This takes the golden-hour glow and turns it up: a radiant primer, a dewy skin tint, liquid highlighter mixed into foundation, cream blush, cream bronzer, and a final glaze of facial oil pressed into the high points. The finish is reflective, juicy, and unapologetically glowy — like a glazed donut, but make it face.
The layering order is critical. Start with a hydrating serum and a luminous primer, then mix one pump of liquid highlighter directly into your skin tint before applying — this gives you glow from within rather than on top. Apply cream blush and bronzer, then press the tiniest amount of facial oil (jojoba or squalane work beautifully) onto the cheekbones, brow bones, and cupid's bow with your fingertips. The oil is the glaze — it creates that wet, reflective finish that defines the look.
This look is a dry-skin dream and a bold choice for oily skin — if you're oily, keep the glaze to the cheekbones only and mattify the T-zone thoroughly. It flatters every age because luminosity reads as youth and health. Pair it with brushed-up brows, a wash of bronzer on the lids, and a glossy nude lip. The whole face should look like it's been kissed by warm light.
The glaze won't last all day without help: mist with a dewy setting spray after application, and carry blotting papers for the T-zone only — never blot the glazed high points. Touch up by pressing a tiny bit more oil onto the cheekbones with your fingertips; the warmth of your fingers melts it in seamlessly. In humid weather, swap the facial oil for liquid highlighter only — you want glazed, not melted.
Burnt Sienna Cut Crease (Soft)
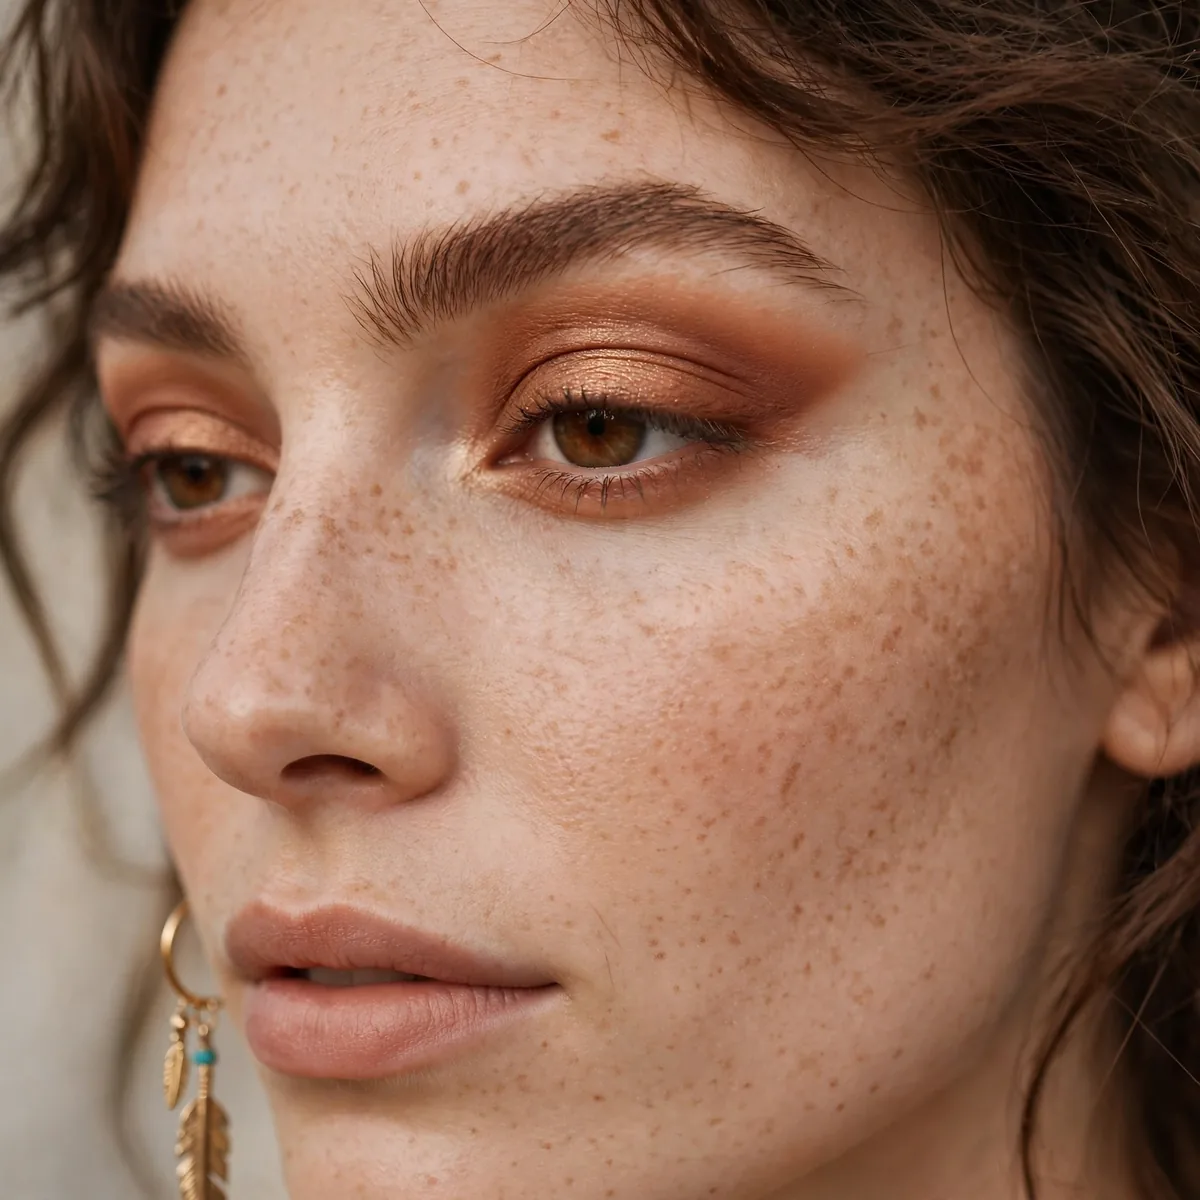
A soft cut crease in burnt sienna takes the dramatic technique and boho-fies it — all the lid definition, none of the harsh lines. Instead of a razor-sharp concealer line, this version uses a softly diffused transition: a light, warm concealer shade patted onto the lid up to the crease, with the burnt sienna blended just above it in a hazy gradient. The lid looks lifted and defined, but everything melts together like watercolor.
Technique: apply your lid shade (a warm champagne or light gold shimmer) across the mobile lid, then with a small blending brush, work the burnt sienna into the crease in windshield-wiper motions — but then immediately soften the upper edge with a clean fluffy brush. The softness comes from that second blending step. The lower edge of the crease color should be slightly more defined (that's the cut), while the upper edge disappears into the brow bone. It's structure without severity.
Burnt sienna — that rich, reddish-brown — flatters warm and deep skin tones gorgeously and makes brown eyes look like polished amber. On hooded eyes, place the crease color slightly above the natural crease so it's visible when the eyes are open; this is the trick that makes cut creases work on every eye shape. Pair it with a nude lip and warm glowing skin — the eyes are architectural, the rest is soft.
For a crease that stays defined, set the lid shimmer with a tacky primer underneath and keep the crease shade matte — matte crease plus shimmer lid is the contrast that makes the cut readable. If the crease starts fading, press a little more sienna into the outer corner with your finger; the warmth of your finger reactivates the pigment. This is drama you can wear to dinner, not just to the festival.
Moonstone Highlighter Glow
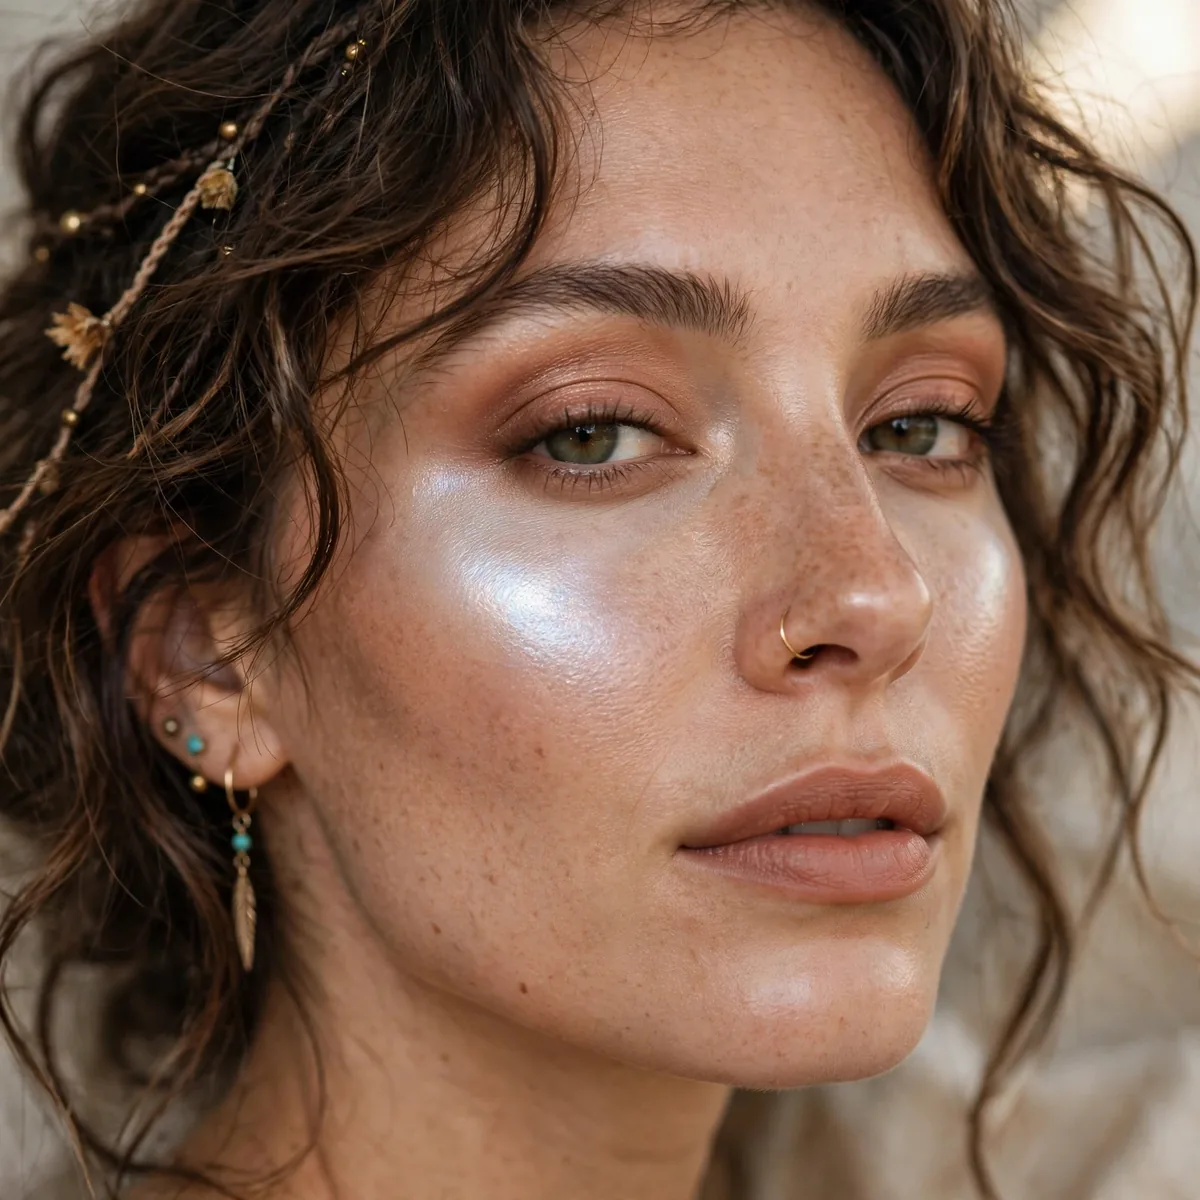
Moonstone highlighter is highlighter with an otherworldly shift — a pale, iridescent shade that flashes blue-violet and pink depending on the light, like the gemstone it's named for. In a boho face, it's the magical detail: pressed onto the cheekbones, the brow bone, and the cupid's bow over warm, earthy makeup, it creates a contrast between the grounded warmth and the ethereal glow. It's the moon to boho's sun.
Application is restrained — moonstone is powerful. Use a small fan brush or your fingertip to press it onto the very tops of the cheekbones, the inner corner of the eyes, and a touch on the brow bone. It should look like light hitting the skin, not like product sitting on it. Over warm bronzer and terracotta tones, the cool iridescence creates a dimensional shift that's mesmerizing when you turn your head. Less is genuinely more; you can always add, but overdone moonstone looks frosty.
This highlighter flatters fair to medium cool skin tones most naturally, but on deeper skin it creates a stunning holographic effect — the iridescence shows up as a prismatic glow. Pair it with the earthy boho base (terracotta lids, bronzed cheeks) and keep the lips nude or glossy. The contrast between the warm face and the cool, shifting highlight is what makes it feel magical rather than just shimmery.
Iridescent highlighters can emphasize texture, so apply over smooth, well-moisturized skin — the high points should be the smoothest part of your face. Avoid layering moonstone over heavy powder, which makes it look chalky; it melts best into cream or liquid bases. For evening, layer a second press just on the cheekbone tops to intensify the shift under artificial light. It also makes a beautiful eyeshadow topper pressed over a matte brown lid.
Desert Dust Contour Glow
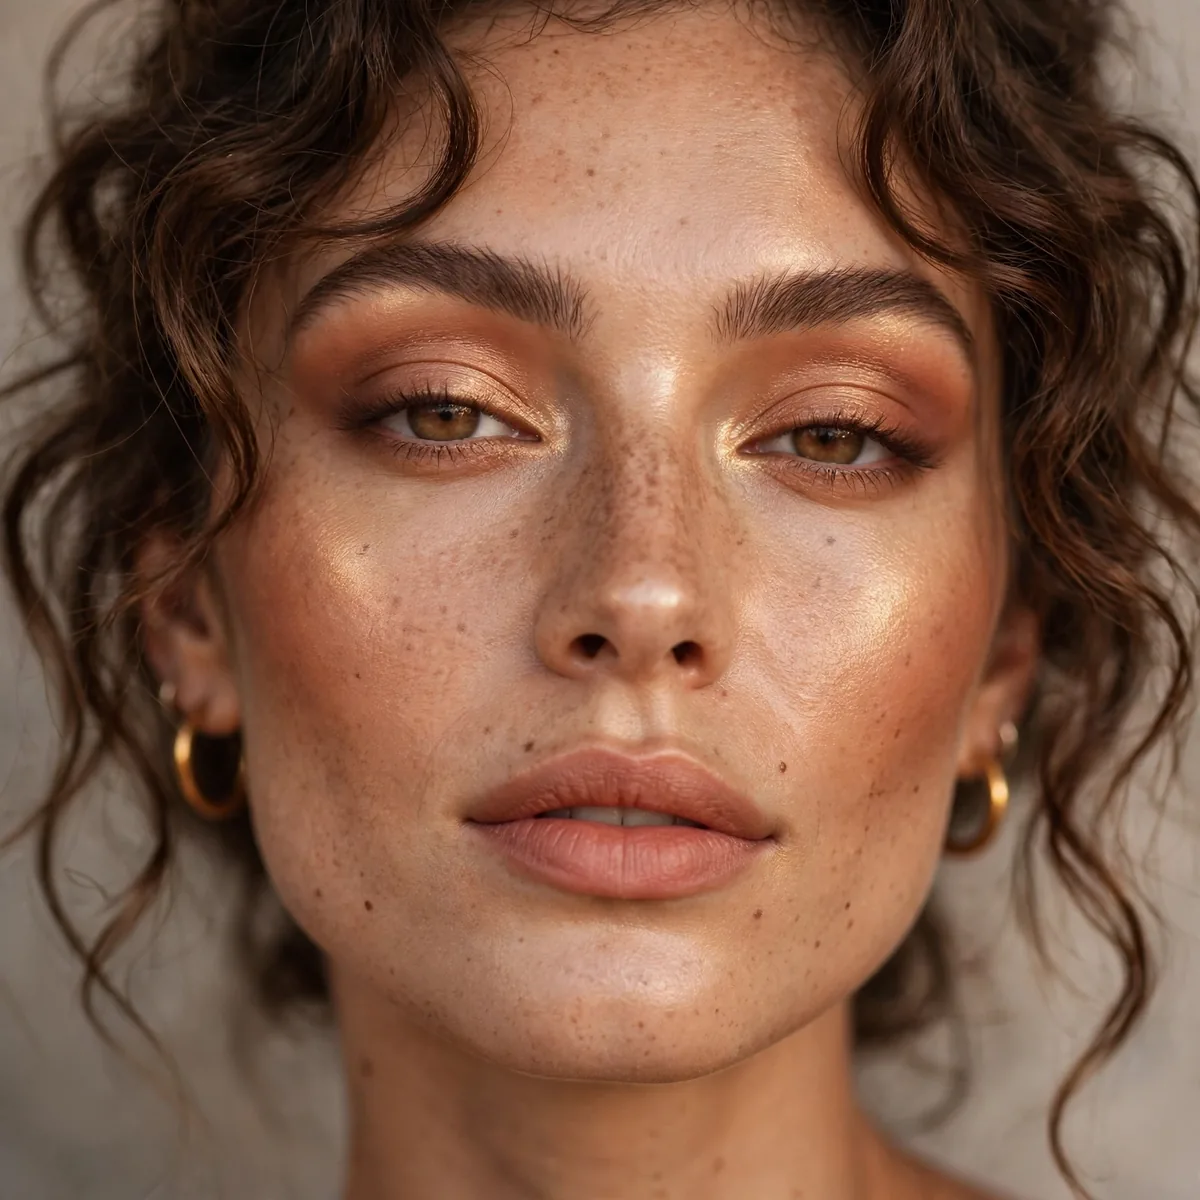
Desert dust contour is contouring stripped of its Instagram severity — warm, dusty browns buffed into the hollows of the face for shape that looks like shadow, not makeup. This uses a matte bronzer or contour shade with a warm, sandy undertone (never gray) swept under the cheekbones, along the temples, and under the jawline, then blended until it disappears into the skin. The face gains definition, but it looks like bone structure, not product.
The boho key is the undertone and the blending. Cool contour shades create a gray cast that reads as makeup; warm, sandy shades mimic the natural shadows of a sun-warmed face. Use a medium fluffy brush and blend in circular motions until you can't see where the contour starts or ends — then blend a little more. The contour should be felt, not seen: when you turn your face, the hollows catch natural shadow and the face looks sculpted by light itself.
This technique flatters every face shape because it's just enhancing what's there: round faces gain cheekbone definition, long faces can contour the forehead and chin to visually shorten, and heart-shaped faces balance with jawline warmth. Pair it with the golden-hour glow skin and a nude lip — the contour provides the structure that lets all that dewiness look intentional rather than just shiny.
For a natural contour that lasts, apply the warm contour shade over your base but under any powder highlighter — the layering order keeps it skin-like. Cream contour sticks give the most natural finish for this technique; the warmth of your fingers melts the product into the hollows seamlessly. Set lightly with a warm-toned powder in the same shade family to lock it without adding a powdery cast. As the makeup settles through the day, the contour only looks more natural.
Pin these earthy, free-spirited looks to your beauty board — and for more boho beauty, see our boho bridal makeup ideas and latte makeup looks.